Stacks and Audio Input🔗
VST Live provides comprehensive features for managing the input and processing of live audio during your performance.
Stacks🔗
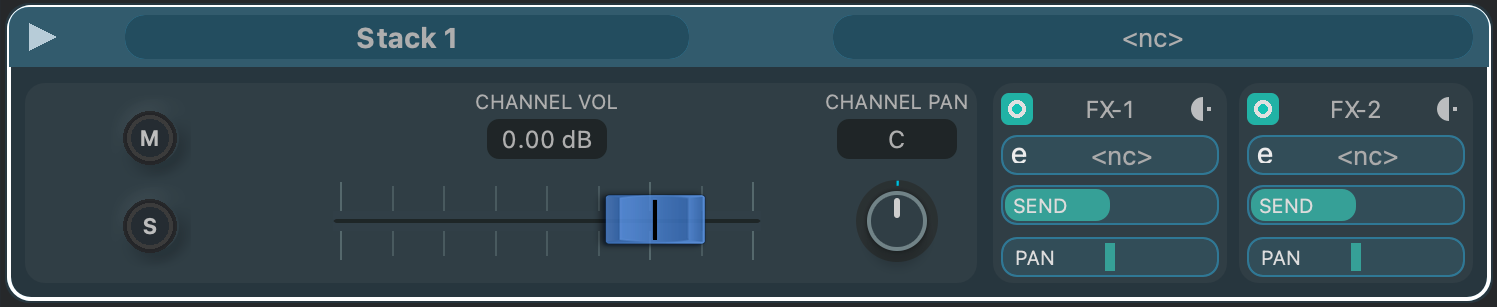
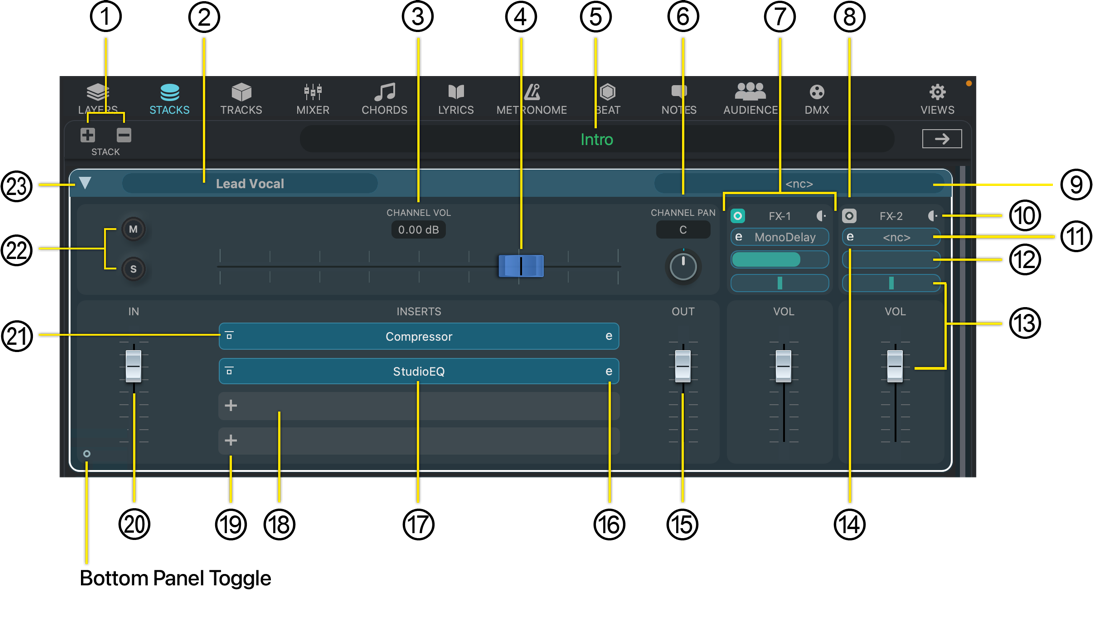
Stacks are the audio counterparts to Layers. Each Stack can hold up to four VST audio plugins, and has two FX sends.
All operations that can be performed in the Stacks panel are also accessible in the Stacks menu. This menu has additional operations for Stacks. Unlike Layers, Parts do not require at least one Stack.
If the active Setlist has a Global Part, a Globals icon button will appear in the Main Panel’s Toolbar. Click it to add view the Global Part’s Stacks below the Song Part Stacks. The Global Stacks will be distinguished with a diagonal background pattern.
Visibility🔗
Like Layers, the amount of a Stack that is visible can be adjusted.
Toggling Visibility🔗
Stacks belong to Parts. To view them:
- Click the Part that you wish to view the Stacks for.
- Click the icon for the Stack View above the Project Zone.
If the active Setlist has a Global Part, a Globals icon button will appear in the Main Panel’s Toolbar. Click it to add view the Global Part’s Stacks below the Song Part Stacks. The Global Stacks will be distinguished with a diagonal background pattern.
Minimizing🔗
Stacks can be minimized so only their most important information is visible.
- To toggle between minimizing and maximizing a Stack, click the disclosure triangle in the upper-right corner of the Stack panel.

Interface🔗
- Add/Remove Stack
- To add a new Stack, click the Plus icon.
- To remove the currently-selected Stack, click the Minus icon.
- Stack Name
To rename a Stack:
- Double-click in Stack name oval.
- Type the new name for the Stack.
- Press Return.
- Stack Channel Volume in Decibels
The Stack’s channel volume is the output level of the Stack. It is the same gain stage as the Stack’s channel in the Mixer.
To adjust the Stack’s output volume numerically:
- Double-click in the numerical display oval.
- Type in the desired decibel level.
- Press Return.
- Stack Channel Volume Slider
This slider allows you to adjust the gain of the Stack’s output channel in decibels. It is the same slider that is accessible for the Stack in the Mixer module.
- Part Name
The name of the Part which the Stack belongs to is displayed here.
- Pan
Control the pan in the Mixer module for the Stack.
- Mixer Send Channels
Stacks have two send effect channels. After the audio flows through a Stack’s insert effects, it can be branched off to the Stack’s two send channels. Audio sent there is processed externally, and returned to the Stack channel.
- Send Effect Bypass
This control optionally bypasses the Send channel. Its visual form indicates the bypass state.
Active
This setting indicates the active state.

Bypassed
This setting indicates the inactive state.

In the bypassed state, the send level indicator will turn grey and be set to zero. Upon activating the send, the send level will return to its previous state.
- Audio Input Source
Clicking here displays a menu of available input sources; choose to select your desired audio source for the Stack.
- Pre/Post Send Topology
You can choose to send audio to a Send channel either before (pre-fader) or after (post-fader) the Stack’s output fader. The icon button toggles between the two states, visually indicating the current settings.
Pre-Fader
This setting indicates the pre-fader state.
Post-Fader
This setting indicates the pre-fader state
- Hosted Send Effect
Load the send VST plugin effect here by clicking in the oval.
- Send Level
This slider, from left to right, controls how much signal is sent to the VST plugin effect.
- Return Level and Pan
These controls apply to the returning audio signal from the Send.
- This dial controls the pan of returning (send) signal back into the Stack.
- The level of the returned signal is set with this slider.
- Edit Send Effect
Click this icon to produce the native editor for the hosted send effect plugin.
- Stack Channel Output
This slider controls the output level from the Stack.
- Edit Insert Effect
Click this icon to produce the native editor for the hosted insert effect plugin.
- Insert Bypass
This control optionally bypasses the insert effect. Its visual form indicates the bypass state.
Active
This setting indicates the active state

Bypassed
This setting indicates the inactive state.

In the bypassed state, the insert slot will turn grey and be set to zero. Upon activating the insert, the slot will return to its previous state.
- Empty Insert Slot
This is the appearance of an empty insert slot.
- Add Insert Button
Clicking this button produces a menu of your VST plugin effects to choose from.
- Add and Remove Stacks
Click the plus or minus buttons to add or remove a Stack to the currently selected Part.
- Insert Active State
To toggle the activate state of the insert, click the icon.
- Mute & Solo
Mute and solo modes provide standard monitoring options.
- Disclosure Triangle
This control toggles between the minimal and full Stack interfaces.
Quick Controls🔗
The Quick Access Controls can be access by clicking the Bottom Toggle widget. These controls can be assigned to each of the insert VST effects, and the two FX sends.
Inserts
You can assign Quick Controls to each of the inserts you have loaded in a Stack.
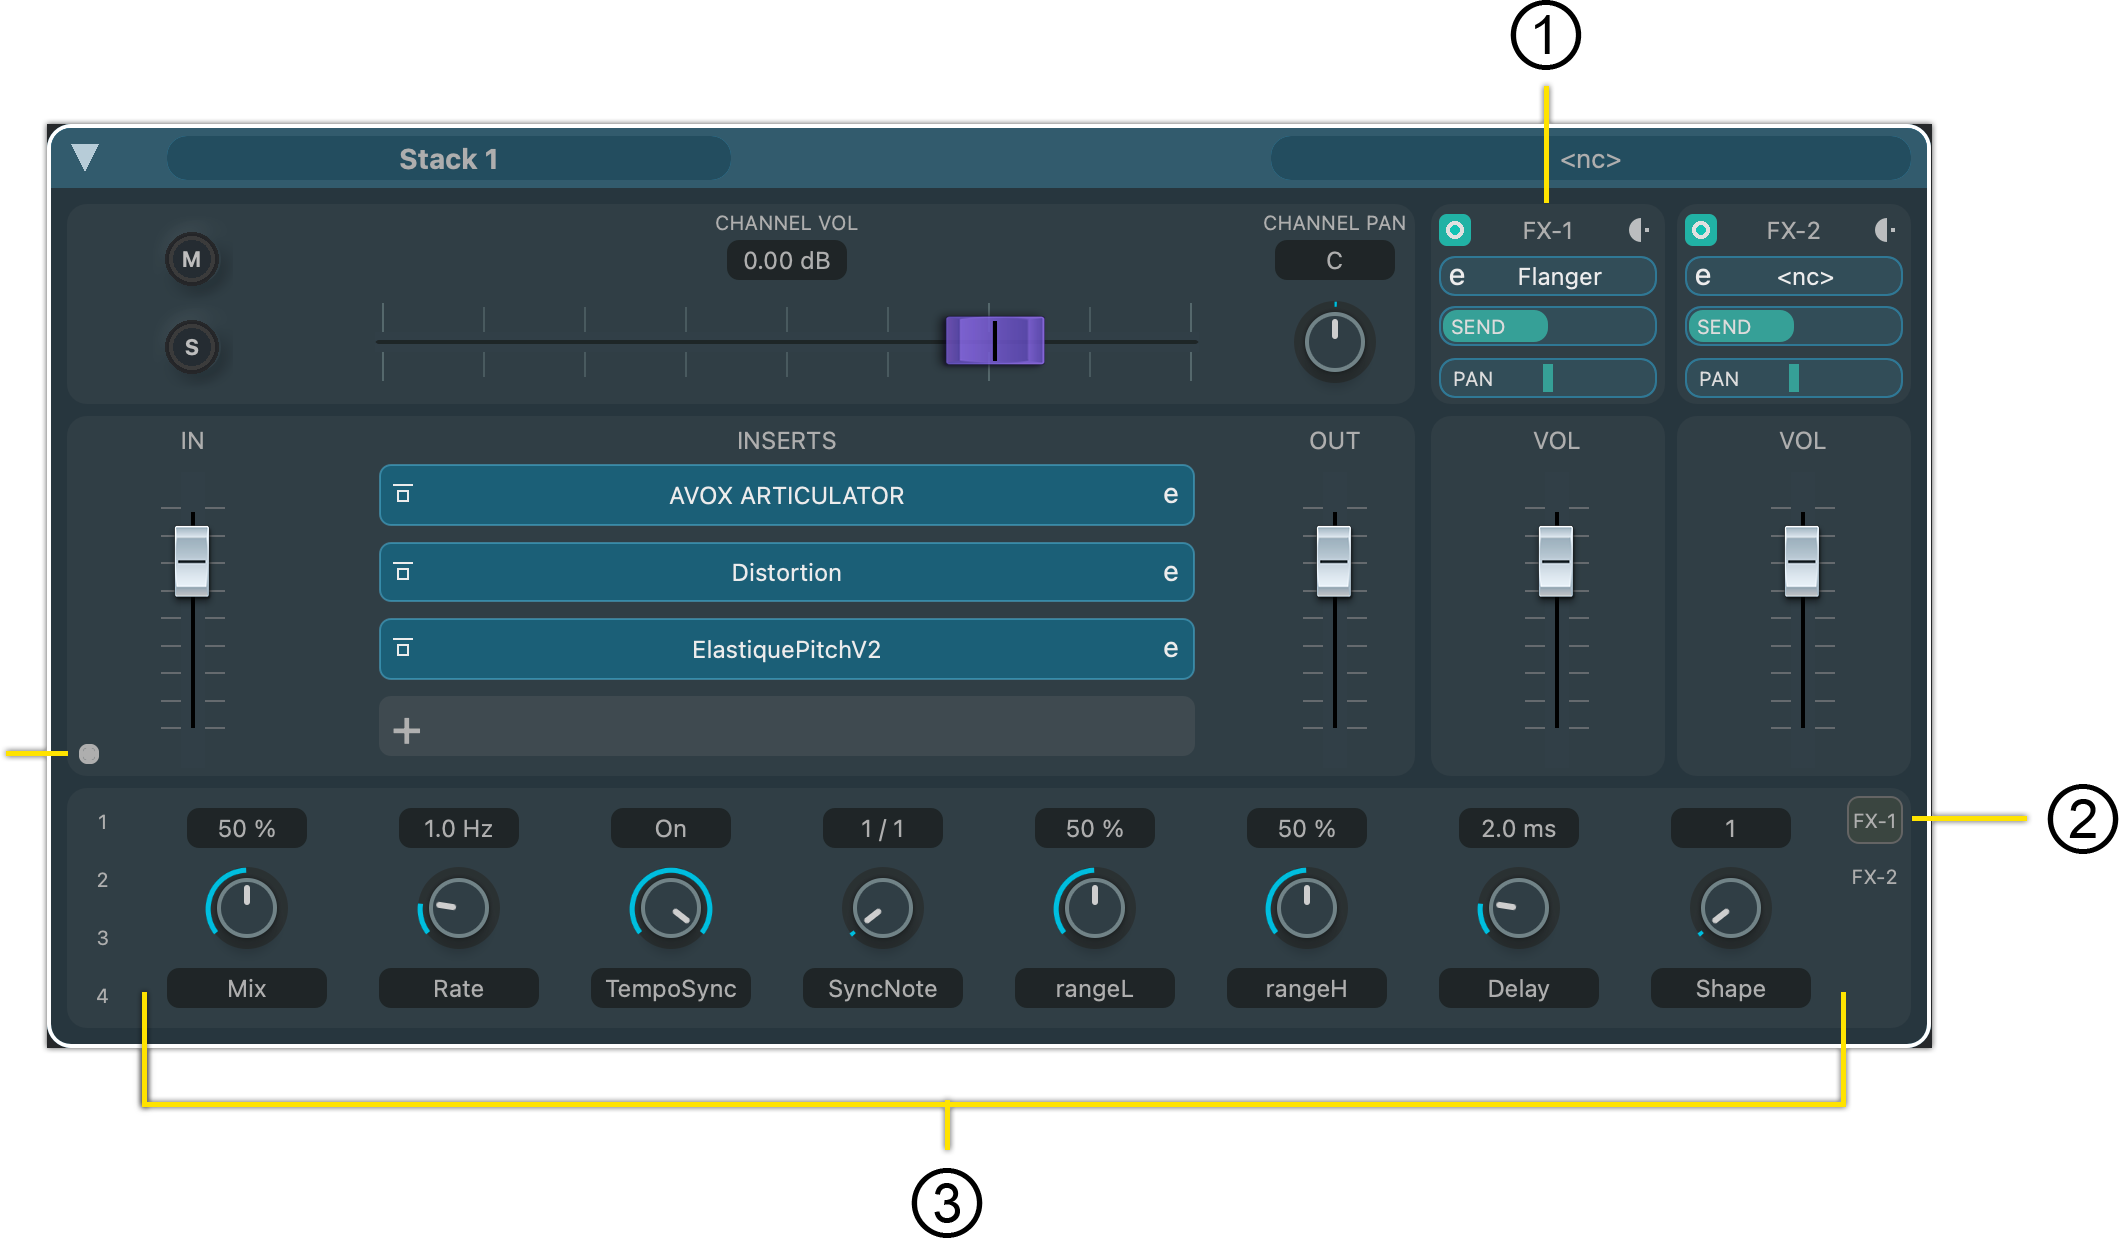
To access the controls, click the insert’s associated number in Quick Control Panel, on the left side.
FX Sends🔗
As with inserts, Quick Controls can also be assigned to the FX sends.
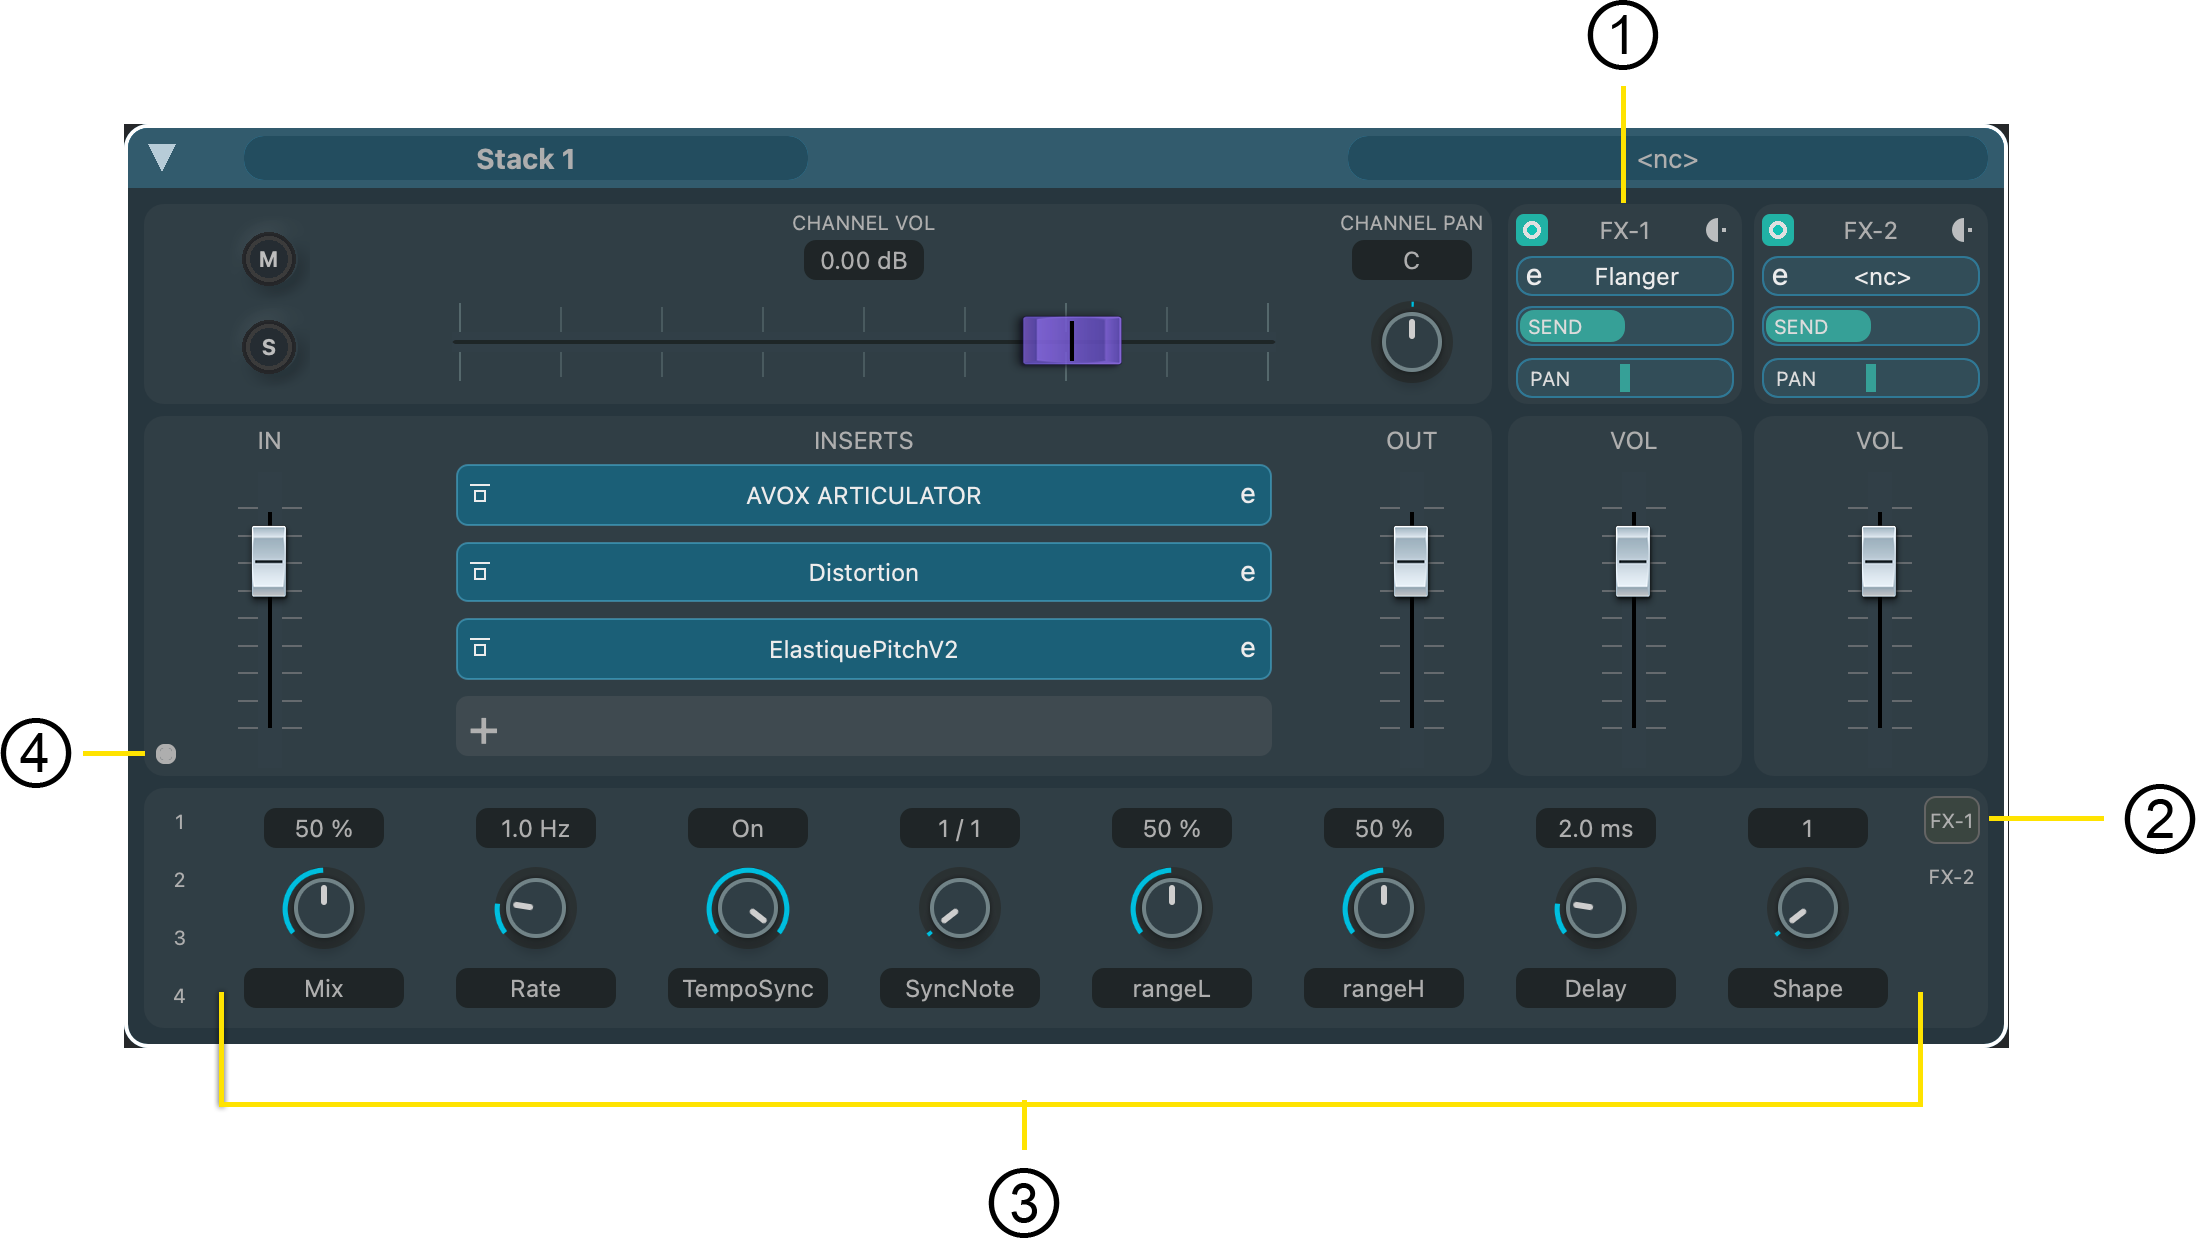
To access the Quick Controls for an FX send, click the associated FX channel number on the right side of the Quick Control Panel.
Stack Operations🔗
Stacks share many of the same operations with Songs, Parts and Layers.
Add a Stack to a Part 🔗
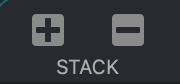
Click the Plus icon.
Choose Stack > New Stack.
Remove a Stack from a Part 🔗
Click the Minus icon.
Cut a Stack from a Part to the Clipboard🔗
- Select the Stack you want to cut by clicking it.
- Choose Stack > Cut Stack.
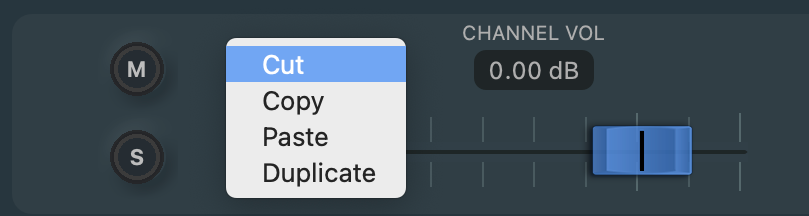
Right-click anywhere in the Stack to access its contextual menu.
Choose Cut.
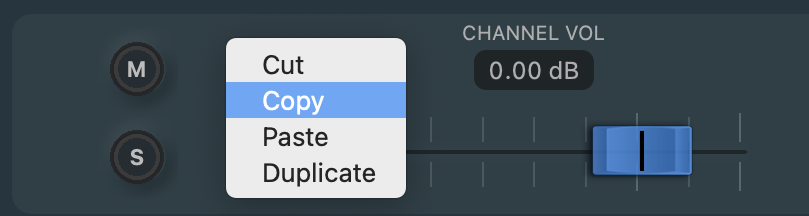
Copy a Stack to the Clipboard🔗
- Select the Stack you want to copy by clicking it.
- Choose Stack > Copy Stack.
OR
Right-click anywhere in the Stack you wish to copy to access its contextual menu.
Paste a Stack from the Clipboard into a Part🔗
- Click the Part in the Setlist in which you wish to paste the Stack.
- Choose Stack > Paste Stack.
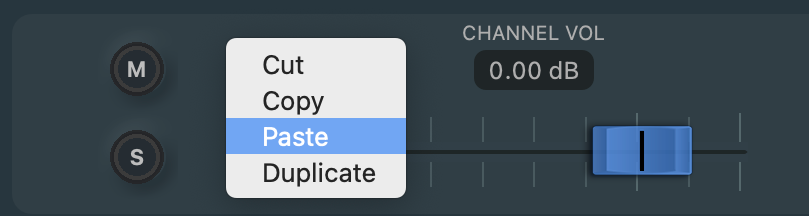
Right-click on any existing Layer in the Part you wish to paste the Stack; this will access that Stack ‘s contextual menu.
Note
A pasted Stack will always appear at the end of a Part.
Duplicate a Stack🔗
- Select the Stack you want to duplicate by clicking it.
- Choose Stack > Stack Layer.
Right-click anywhere in the Stack you wish to copy to access its contextual menu.
Choose Duplicate.
A duplicated Stack will always appear directly after the currently selected Stack in a Part.
Rename a Stack🔗
- Double click on the Stack’s name in top-right of the Stack’s panel.
- The cursor will turn from an arrow to a caret.
- You can now type, changing the Stack’s name.
- Press Return.
Loading and Saving Stacks🔗
Individual Layers can be loaded and saved to a Part from the Stack menu.
Load a Stack🔗
- Choose the Part in you wish to load a Stack.
- Choose Stack > Load Stack.
Result: The loaded Stack will appear after the selected Stack.
Save a Stack🔗
- Select the Stack you wish to save.
- Choose Stack > Save Stack.
Save the Default Stack🔗
You can choose a specific Stack to load whenever a new Stack is created. To create this default Stack:
- Select the Stack you wish to be the default Layer when a Part is created.
- Choose Stack > Save Default Stack.
Live Audio🔗
Live audio can be processed with Stacks for effects and monitor mixes.
Effects Processing🔗
By hosting VST audio effect plugins, VST Live can remove the need for hardware signal processors such as guitar and vocal pedals.
Because Stacks are tied to parts, effect plugins automatically activated and deactivate when needed during your performance.
Monitor Mixes🔗
Monitor mixes can be created in VST Live’s Mixer. By using the Mixer’s Send feature, you can create different mixes for each band member.