Mixers🔗
VST Live provides mixers for both light and sound.
Audio Mixer🔗
VST Live’s Mixer is similar to one in a DAW, but optimized for live performance .
Interface🔗
There are two elements to the Mixer’s interface: the Toolbar and individual Channel Strips.
Channel Strip🔗
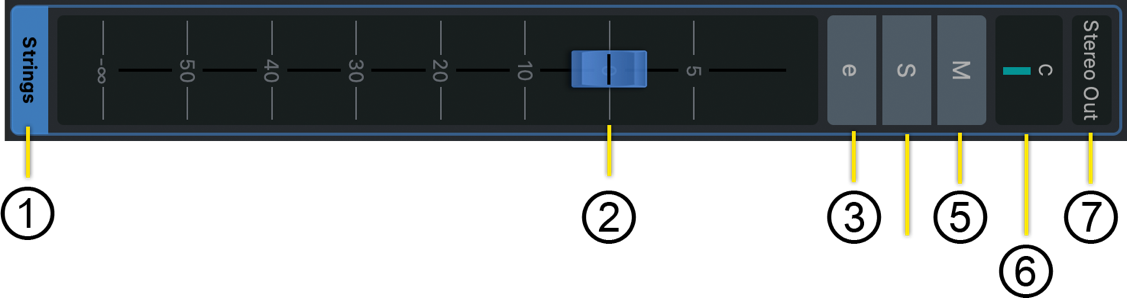
- Name
To change the name of a channel strip: double-click on the name, type the new name, and press Return.
Some channel names cannot be changed here (e.g., instrument names).
- Fader
Adjust the fader to change the amplitude of the channel’s output.
- Open Channel Rack
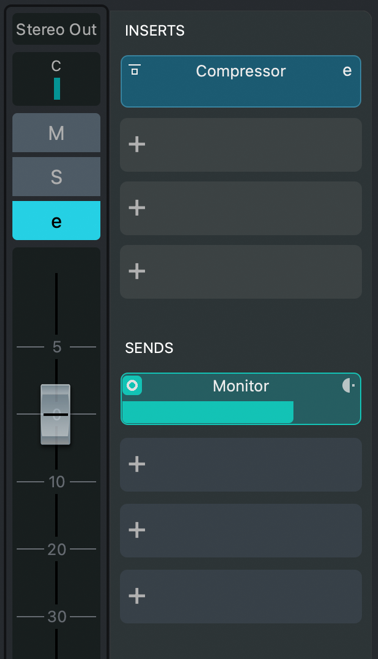
Clicking this icon opens the channel’s Rack (on the right side of the channel). The Rack contains slots for four inserts and four sends.
- Mute
Mutes the channel.
- Solo
Solos the channel.
- Pan
Controls the channel’s stereo pan.
- Output Device
This is the destination of the audio channel. To change it, click on the text, and select your desired destination from the pop-up menu.
Toolbar🔗
There are four icon buttons and a slider in the Toolbar:

- Channel Visibility Panel
Mixer channels can be hidden from the Mixer View with this function.
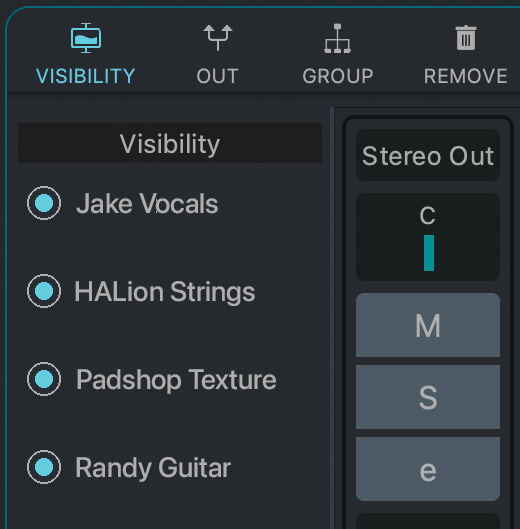
To open the Visibility panel, click the Visibility icon. When the icon is illuminated, the panel is open. Click in circle next to a channel’s name to toggle hiding or showing the channel.
Hidden channels still process audio and are audible.
- Create Output Channel
Click this icon to create a new Output channel. An Output channel allows you to split an incoming signal into multiple outgoing signals.
- Create Output Channel Create Group Channel
A Group channel allows multiple channels to be combined into a single channel. Groups channels can also serve as FX channels.
- Remove a Channel
To remove a channel, select the channel (by clicking the channel name), and click the Remove Channel icon.
- Horizontal Zoom
Use this slider to control the horizontal zoom of the Mixer View.
Contextual Menu 🔗
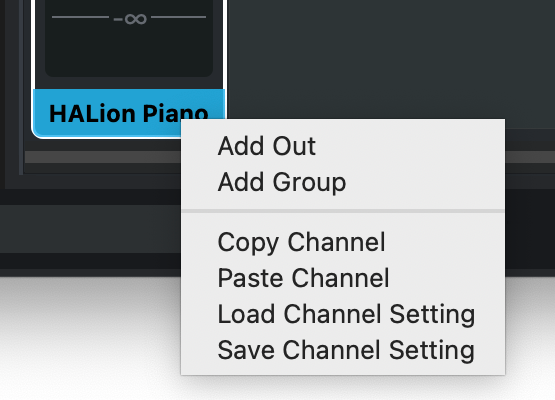
Right-clicking on a selected channel will display a contextual menu.
Add Out
Creates a new Output channel in the Mixer, and connects the selected channel’s output to it.
Add Group
Adds a new Group channel to the Mixer, and connects the output of the selected channel to it.
Copy Channel
Copies the selected channel’s settings to the clipboard.
Paste Channel
If the clipboard currently holds channel settings, this command applies to them to the selected channel.
Load Channel Setting
Loads a channel setting from storage into the selected channel.
Save Channel Setting
Saves the selected channel’s setting to storage.
Naming Channels🔗
By double-clicking on the current name of a channel, you may enter a new one.
If you have not provided your own name for a Layer, then its output channel will have the name of the virtual instrument contained inside. By changing the name of the Layer, the corresponding channel name will change in the Mixer.
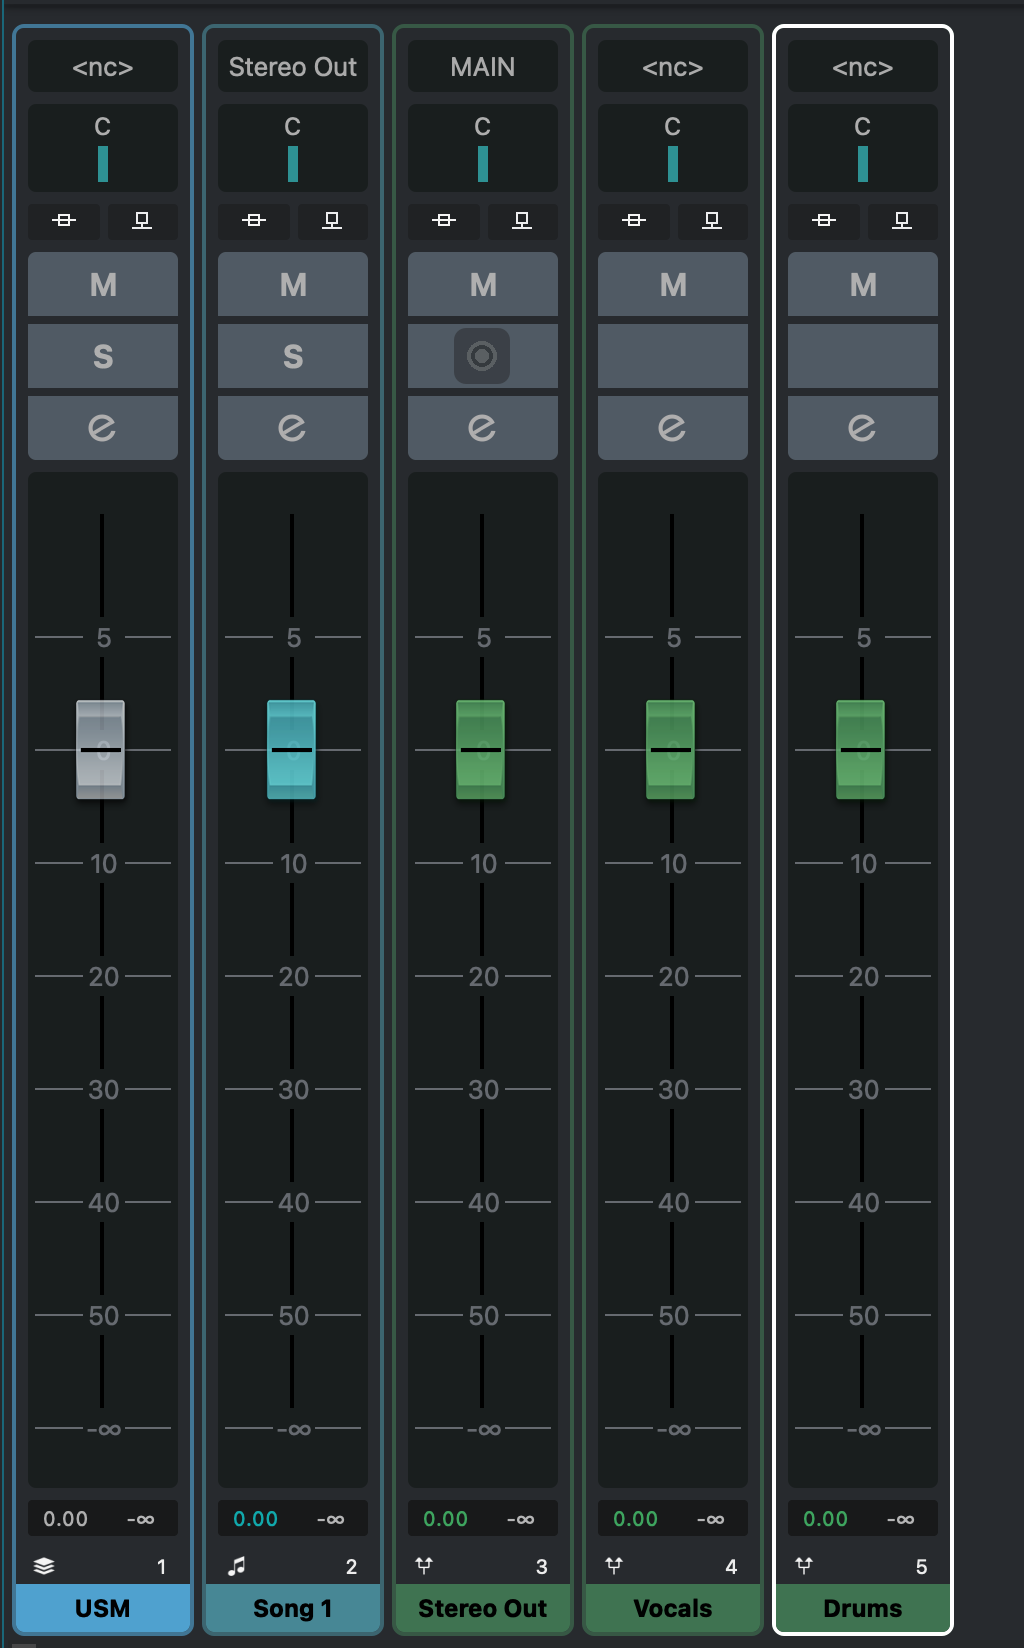
Channel Types🔗
There are several types of channels available in the Mixer, each associated with a different color.
Layer
![]()
The output from virtual instruments contained in Layers are connected to these channels.
Stack
![]()
Like Layer channels, Stack channels correspond to the Stacks created for Parts in Songs.
Internal
![]()
VST Live’s built-in sound generators use Internal channels: Beat (step-programmed drum machine) and Metronome.
Group
![]()
Like their DAW and analogue console counterparts, Group channels do not produce any sound on their own—they are destinations other channels can send their output to.
Song
![]()
Song channels are special-purpose Group channels. For each Song in your Setlist, VST Live creates an individual Song channel. The outputs of all Tracks in a Song are routed to this channel.
Output
![]()
The final destination of audio signals in the Mixer is an Output channel. These channels connect to audio interfaces.
DMX Mixer🔗
The DMX Mixer provides hands-on control over a DMX Universe. The sliders are meant to control the dimmer capability, but you can assign the channels according to your fixtures’ personalities.
Interface🔗
The DMX Mixer functions similarly to an audio mixer.
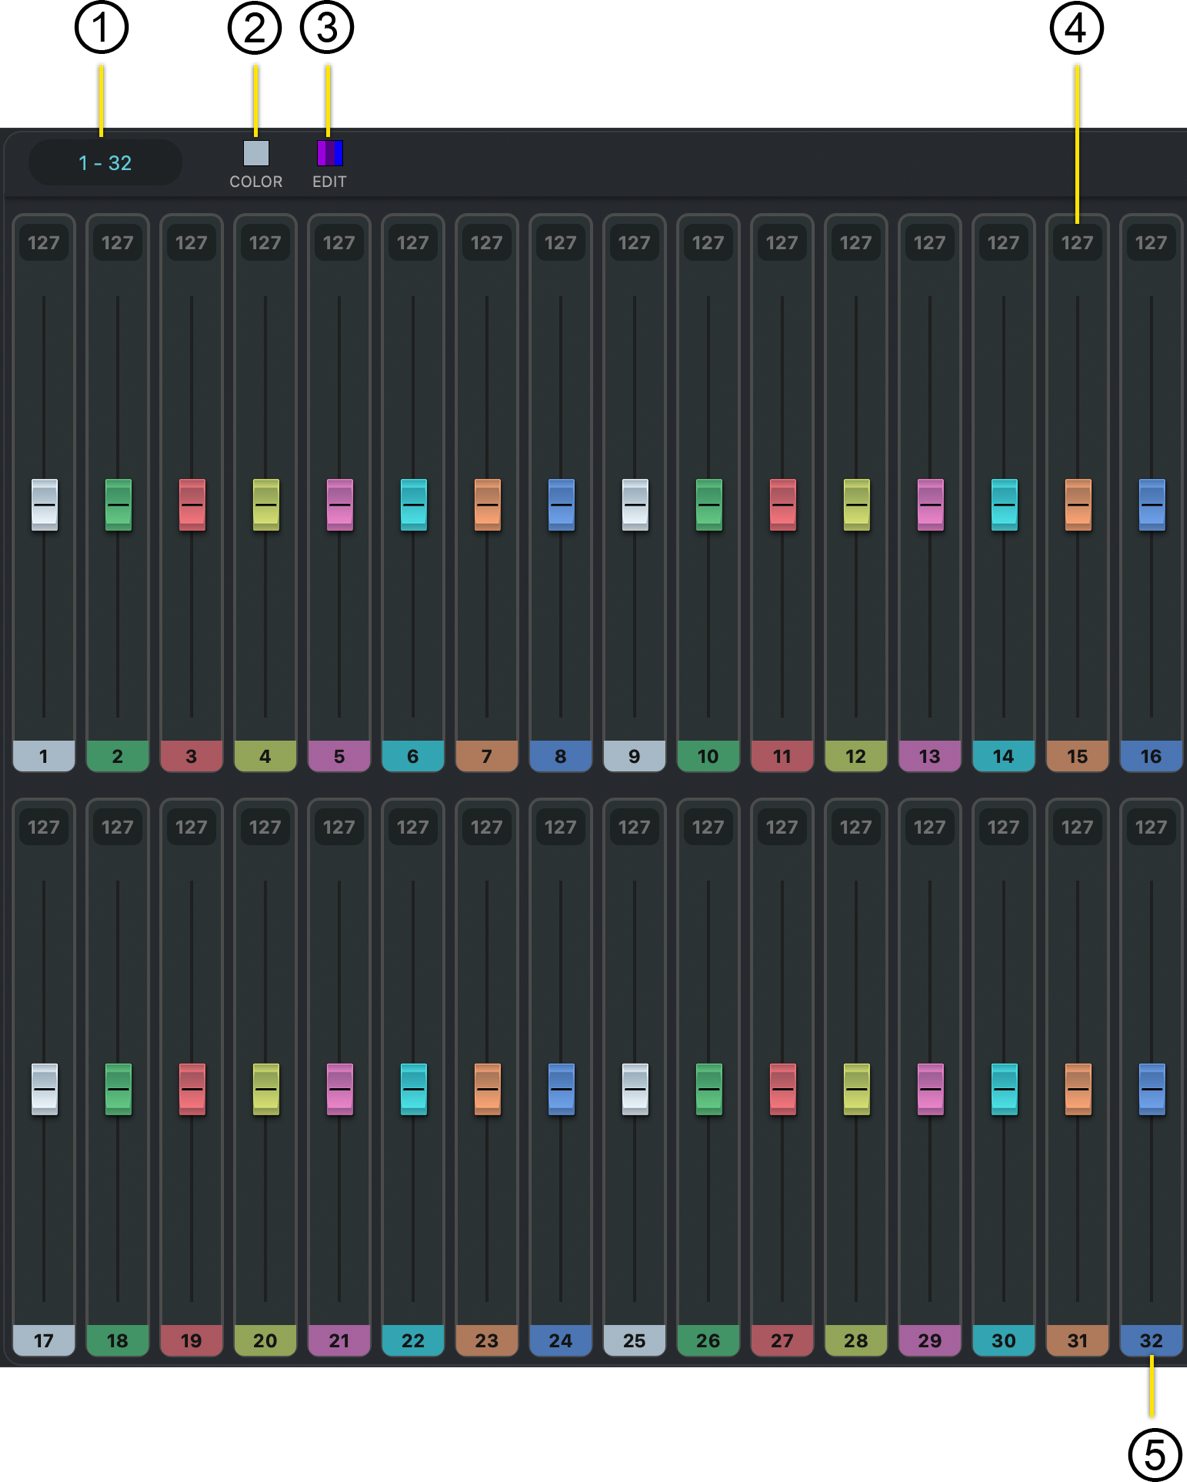
- Channel Range
The currently represented channels of the DMX Universe.
- Actively-assignable Color
If a channel is a selected, clicking this icon sets the channel’s color to that color.
This is the color of the channel in the user interface, not a color command sent to a fixture.
- Color Palette
Clicking this icon displays a pop-up menu of available colors to set to the assignable color icon.
- Channel Value
The current value of the DMX channel (0-256).
- Channel Number / Color
This icon has two functions:
- The number represents the DMX Chanel number.
- Clicking the number displays a pop-up color palette to assign to the channel (in the user interface).
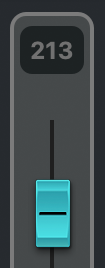
Selecting a Channel🔗
The current value of the DMX channel (0-256).
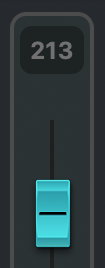
A white border will appear around the selected channel.
Recording Fader Movements🔗
To record the fader movements on to a DMX Track, set the input of the DMX Track to the DMX Mixer.
- To view the fader movements of a DMX Track on the DMX Mixer, set the output to the DMX Mixer.
Choosing the Channel Range🔗
A DMX Universe supports 512 channels. VST Live’s DMX Mixer, at any one time, provides access to a user-specified subset.
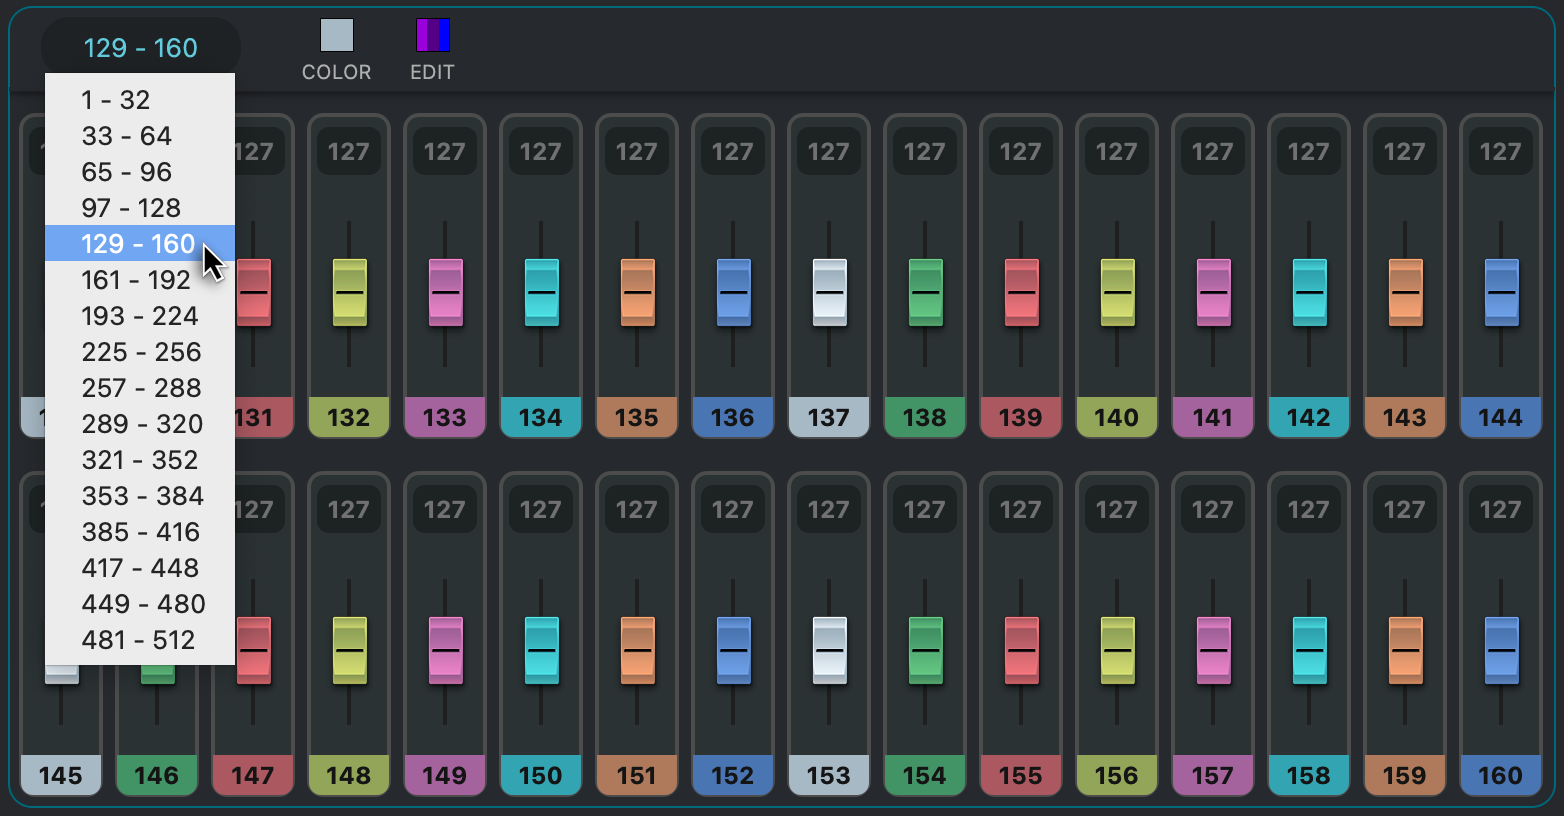
To change the subset of channels displayed in the DMX mixer, click in the currently-selected channel range display in the upper-left corner
Monitor Mixer🔗
The Monitor Mixer offers a dedicated mixing view for creating separate monitor mixes. Each audio channel can send its signal to different output channels, allowing you to build custom monitor mixes—similar to in-ear monitor (IEM) systems used in live sound.
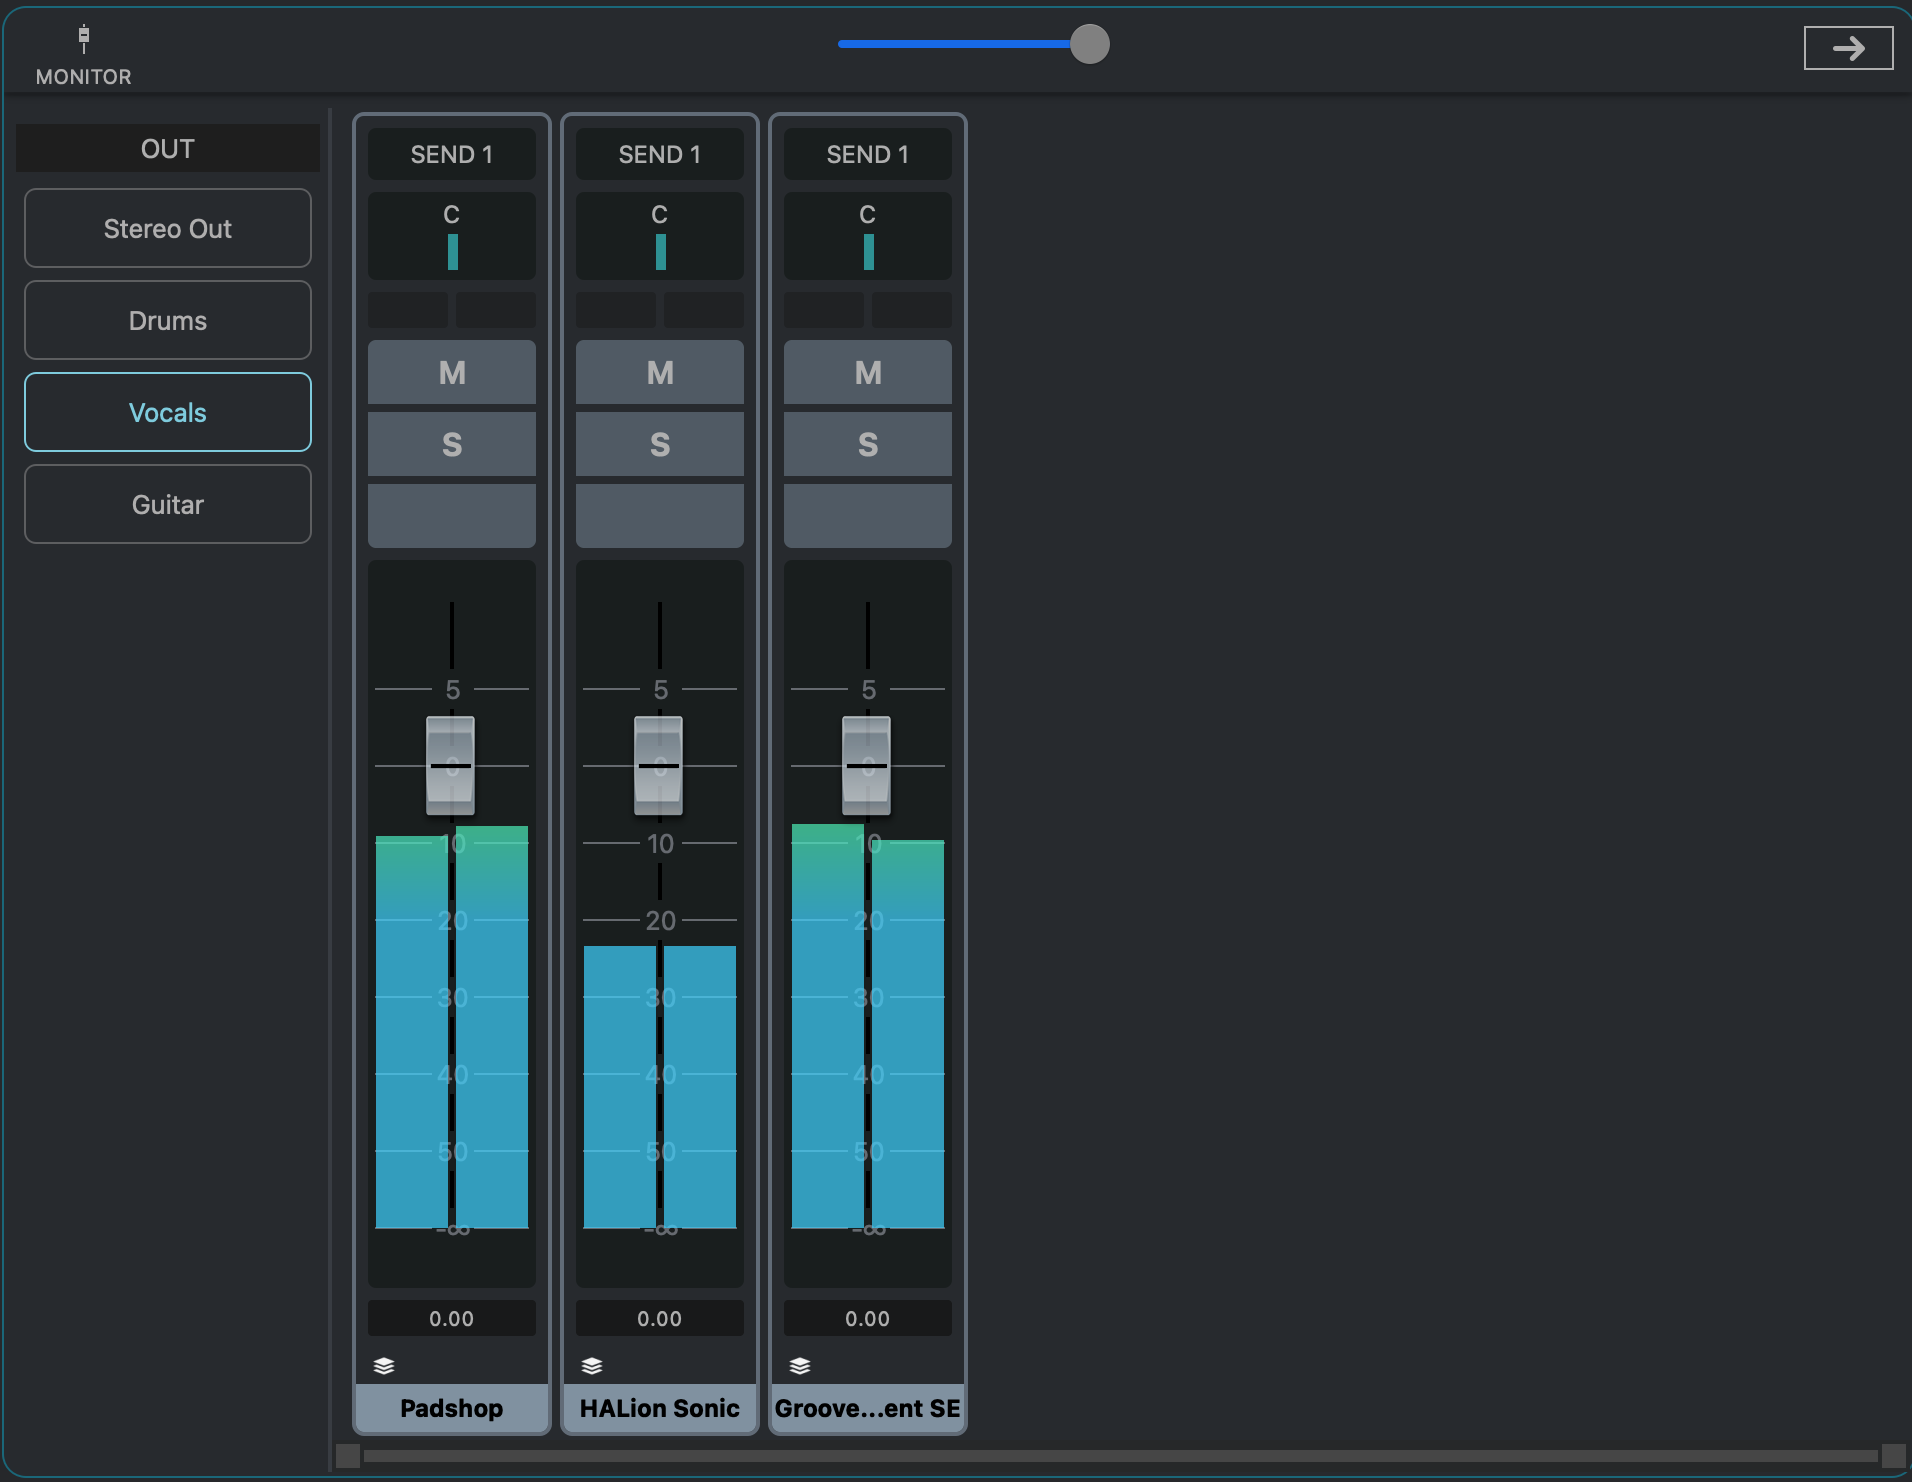
Example Setup🔗
Here is an example of how it works:
-
OUT Channels
In the Mixer, create one or more OUT Channels to serve as your monitor destinations.
-
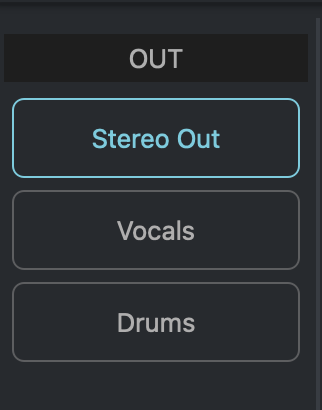
Select Monitor
Each OUT Channel automatically appears as a selectable monitor destination in the Monitor Mixer.
-
Use SENDS
Add a SEND in any Audio Channel to route its signal to the chosen monitor destination.
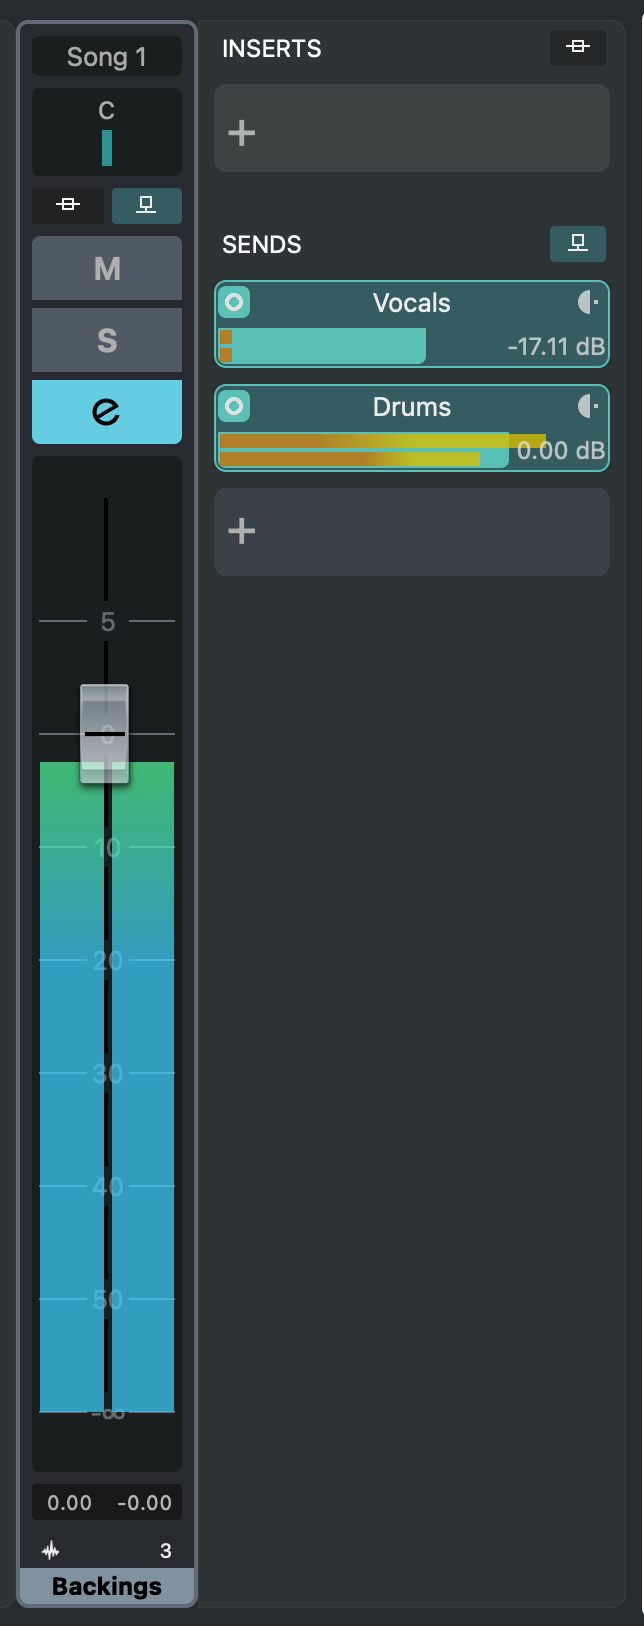
-
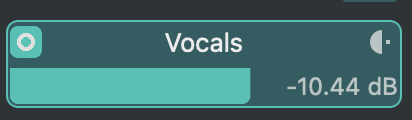
Each SEND appears as a Source
When selecting a monitor destination, the Monitor Mixer displays all Audio Channels that send to that destination via SENDS.
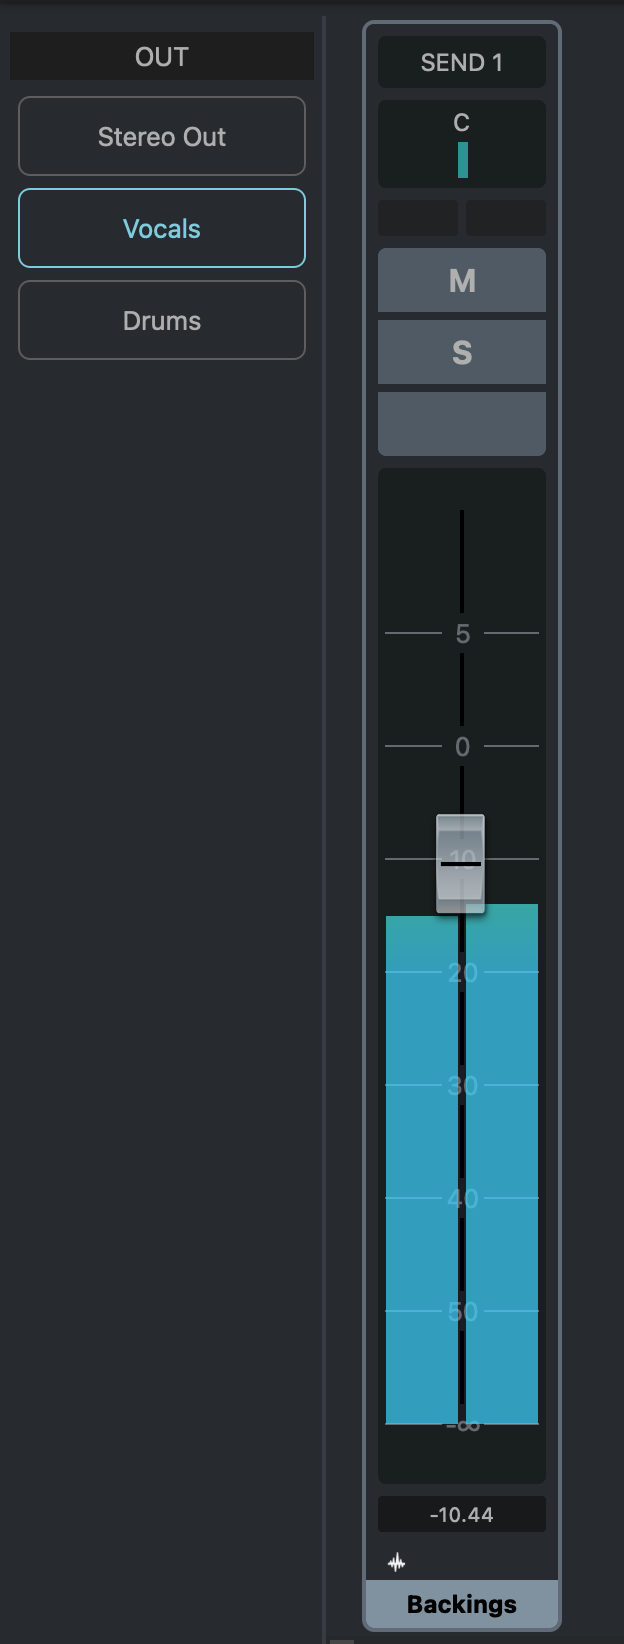
The Volume slider of a Monitor Mixer Channel controls the Send Volume of the corresponding Mixer Channel.
Quick Create SEND🔗
This menu control lets you quickly create SEND connections from existing Audio Channels to the selected monitor destination.