Layer & Zones🔗
Layers and Zones are the primary elements for managing MIDI in VST Live.
Layers🔗
A Layer is a flexible, powerful MIDI engine. Every Part (Global and Song) contains at least one Layer.
A Layer is automatically generated when a Part is created.
Layers are optimized to host VST instruments, but can also be configured for two other functions:
- Host a MIDI effect.
- Pass MIDI data from the Layer’s MIDI input source to its selected MIDI output. The inputs and outputs can be hardware interfaces or virtual MIDI ports.
VST Live supports the internal creation of virtual MIDI devices.
Visibility🔗
The visibility of Layers can be adjusted to maximize screen real-estate.
Toggling Visibility🔗
Layers can be hidden and revealed. To toggle visibility:
- Click the Part that you wish to view the Layers for.
- Click the icon for the Layer View above the Project Zone.

If the active Setlist has a Global Part, a Globals icon button will appear in the Main Panel’s toolbar. Click it to add view the Global Part’s Layers below the Song Part Layers. The Global Layer will be distinguished with a diagonal background pattern.
Minimizing Layers🔗
The default interface for Layers exposes their complete parameters.
Layers can be minimized so only their most important information is visible.

To toggle between minimizing and maximizing a Layer, click the disclosure triangle in the upper-right corner of the Layer Zone.

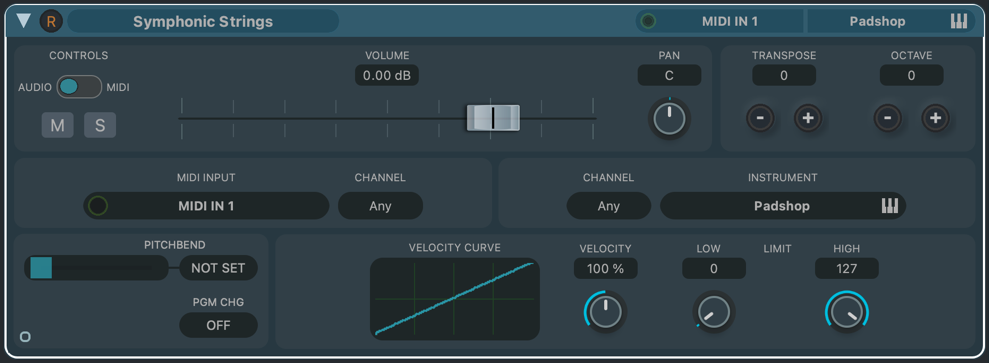
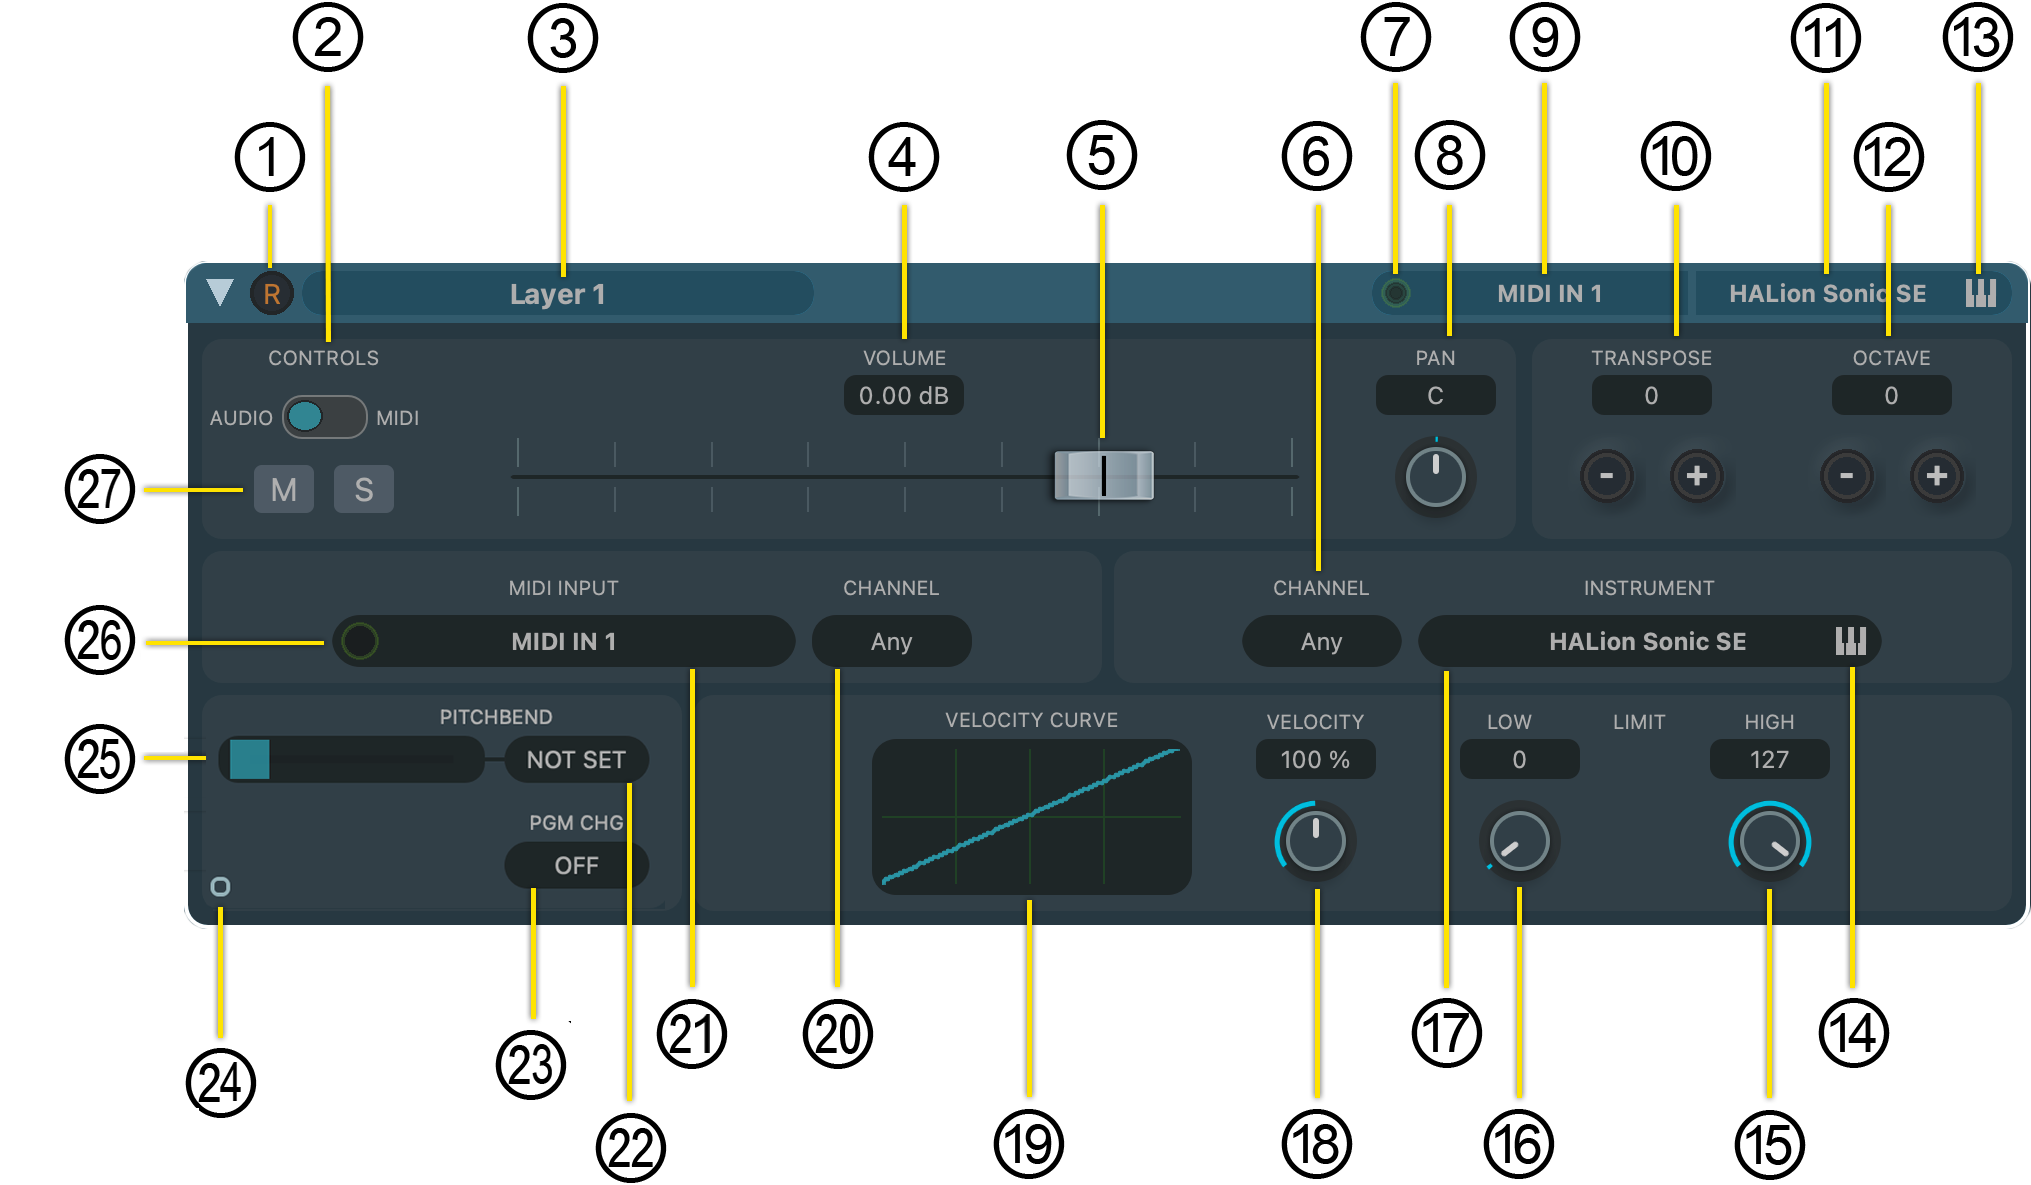
Interface🔗
The default interface for Layers provides flexible configuration settings for use as a virtual instrument, MIDI effect or MIDI routing.
- Record a MIDI Track
Creates a MIDI track for this Layer. The track will be given the title of the Layer. (You can access it in the Tracks module.) After the Track is created, clicking the icon will record-enable the Track.
- Channel Mode
Layers have two channel modes: MIDI and audio.
Audio
In audio mode, the fader corresponds to the Layer’s channel strip in the Mixer.

- MIDI
In MIDI mode, the fader sends MIDI CC control change messages:
- Continuous controller 07 for volume
- Continuous controller 10 for volume
Initially, both the volume and pan have no value, as their cardinality precludes an unambiguous zero value.

To initialize MIDI volume and pan, move the controls to their visual equivalent that you would want for audio controls.

To reset the MIDI volume or pan, Cntl/Cmd-click on the fader or pan knob.
- Layer Name
When a Layer is created, its name defaults to “Layer” followed by the number of Layers in the selected Part. To change the name, click inside the Layer’s name oval, type the new name, and the press Return.
- Volume Level Display
The Layer’s volume is displayed numerically according to the channel mode.
- Audio: The channel volume is expressed in decibels (logarithmic).
- MIDI: The channel volume is expressed as a whole number ranging from 0-127 (linear).
- Volume Fader
This fader corresponds to the numerical volume level display.
- MIDI Input Channel
Outgoing MIDI data will be blocked except for the channel set here. Setting it to “Any” allows all MIDI data to pass from the output, regardless of channel.
- MIDI Icon
This icon illuminates to indicate MIDI activity.
- Pan Control
The pan control varies in functionality depending on whether the Layer channel is set to Audio or MIDI mode.
- MIDI Input
Click this field to select the MIDI input source for the Layer. There are two choices:
- MIDI interface: Live hardware inputs and virtual MIDI ports are both supported.
- Track: A MIDI track from within VST Live’s sequencer.
- Transpose
Transpose incoming MIDI note data before it is processed by the hosted instrument. This functionality is optimized to change an instrument’s key. VST Live’s GUI interface provides two methods to adjust the note offset:
- Double-click inside dark oval, type the offset value, and then Return.
Click the plus or minus icons.
- Hosted VST Instrument
Select the function to be performed by the Layer. While Layers are optimized for virtual instruments, three functions are available to choose from:
Exclusive Virtual Instrument
The Layer will host a VST Instrument that is only available to the selected Layer. Depending on the MIDI input source, the instrument can be used for live performance or sequenced playback from one of VST Live’s MIDI tracks.
MIDI Effect
MIDI effects are VST effect plugins which can use MIDI input as a real-time parameter (e.g., Auto-Tune®, Stutter Edit®).
Output
Passes the incoming MIDI signal (from the selected MIDI number) to the MIDI output port you select. All MIDI data will be processed according to your settings for this Layer (e.g., transposition).
Shared Virtual Instrument
The multitimbral capabilities of virtual instruments can be used by sharing the same virtual instruments across Layers, and setting each sound program slot to a different MIDI channel.
- Octave Shift
Shift the incoming note data by one more octaves (12 semitones). This functionality is optimized to change the note range of the instrument. The interface provides two methods to adjust the note offset:
- Double-click inside dark oval, type the octave offset, and then press Return.
- Click the Plus or Minus icons.
Single octave shifts are also possible through the transpose using a setting of plus or minus 12 semitones.
- VST Instrument Editor
If the Layer is hosting or sharing a VST instrument, clicking this icon will display the instruments native editor. It is the same function as #14, but also provided here so as to be accessible if the Layer is minimized.
- VST Instrument Editor
This control performs the same function as #13.
- Velocity Floor
Note velocities below this value will be set to this value.
- Velocity Ceiling
Note velocities above this value will be set to this value.
- Layer Function Menu
Displays the menu to choose the virtual instrument for the Layer (or other function).
- Velocity Dynamics
Compresses or expands velocity data by a percentage.
- Velocity Curve
Remaps incoming note velocities. The X-Axis is the incoming velocity; Y-Axis is the new velocity.
The Velocity Curve Editor
Clicking the curve display on the Layer panel opens the Velocity Curve Editor.
- Across the top are preset curves.
- To edit the curve yourself, adjust the points accompanying the curve.
Velocity curves can be thought of, in terms of dynamics processing, as a compressor knee function.
- Input MIDI Channel Filter
Filters out any MIDI data except that which matches this channel number. To disable the filter, choose all. (This is equivalent to MIDI Omni mode.)
- MIDI Input Source
Use this field to set the MIDI input source for the Layer.
- To play a Layer’s virtual instrument live, select the MIDI controller or MIDI interface the controller is connected to.
- To play a Layer’s virtual instrument from a MIDI track, select the track name.
To route a real or virtual MIDI input signal, choose the desired MIDI port.
- Pitch Bend Value
A Layer’s current MIDI pitch bend value is displayed here. Use the Pitch Bend Slider (25) to set/change it.
- A positive value will increase pitch.
- A negative value will decrease pitch.
These controllers are used in two contexts:
- Real-Time: Values will be output in real-time as you turn the dial, or press RETURN after typing a new value.
On Activation: Whenever the Part becomes active, each of the assigned controller values will be sent to its associated continuous controller.
- MIDI Program Change Number
The program number to select for a MIDI program change (along with the bank selected by MSB and LSB).
- Macro Control Access
Clicking this button toggles the display of the MIDI Continuous Controller Panel.

For each of the eight controllers:
- The top number is the controller number’s current value. To change this number, either double-click the number and type the desired value, or turn the dial.
- The bottom number is the MIDI controller number that the value is applied to.
These controllers are used in two contexts:
- Real-Time: Values will be output in real-time as you turn the dial, or press RETURN after typing a new value.
- On Activation: Whenever the Part becomes active, each of the assigned controller values will be sent to its associated continuous controller.
- Pitch Bend Control
This widget controls the MIDI pitch bend for the Layer. It is equivalent to the pitch bend controller on a MIDI keyboard or other input device.
- MIDI Input Activity Indicator
Visually indicates incoming MIDI data.
- Layer Mute and Solo
These controls provide the standard mute and solo mixer functions.
- Mute: Silence the Layer’s audio output.
- Solo: Audition only the output of this Layer, or (if other channels are already soloed) add the output of this channel to the other soloed Layers.
The scope of the mute and solo functions depends on whether the Layer’s controls are set to MIDI or Audio.
- MIDI: The scope is the MIDI channel. Muting the Layer prevents MIDI from triggering its hosted virtual instrument or leaving the Layer’s MIDI output. Soloing mutes all of Layers that share the same MIDI channel
- Audio: The scope is VST Live’s Mixer. Mute and Solo behave as their traditional, DAW audio counterparts.
Layer Operations🔗
Layers share the same basic operations as Songs and Parts.
Add a Layer to a Part🔗
There are three possible ways to add a Layer to a Part.
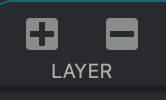
IconClick the Plus icon.
Menu CommandChoose Layer > New Layer.
Media BayDrag a Layer from the Media Bay.
New Layers are always added to the end of the selected Part’s list.
Remove a Layer from a Part🔗
Click the Minus icon.
Cut a Layer from a Part to the Clipboard🔗
- Select the Layer you want to cut by clicking it.
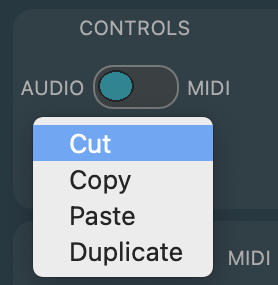
- Choose Layer > Cut Layer.
- Right-click anywhere in the Layer to access its contextual menu.
- Choose Cut.
Copy a Layer to the Clipboard🔗
- Select the Layer you want to copy by clicking it.
- Choose Layer > Copy Layer.
- Right-click anywhere in the Layer you wish to copy to access its contextual menu.
- Choose Copy.

Paste a Layer from the Clipboard into a Part🔗
- Click the Part in the Setlist in which you wish to paste the Layer.
- Choose Layer > Paste Layer.
- Right-click on any existing Layer in the Part you wish to paste the Layer; this will access that Layer’s contextual menu.
- Choose Paste.

A pasted Layer will always appear at the end of a Part.
Duplicate a Layer🔗
- Select the Layer you want to duplicate by clicking it.
- Choose Layer > Duplicate Layer.
- Right-click anywhere in the Layer you wish to copy to access its contextual menu.
- Choose Duplicate.

A duplicated Layer will always appear directly after the currently selected Layer in a Part.
Rename a Layer🔗
- Double click on the Layer’s name in top-right of the Layer’s panel.
- The cursor will turn from an arrow to a caret.
- You can now type, changing the Layer’s name.
- Press Return.
Loading and Saving Layers🔗
Individual Layers can be loaded and saved to a Part from the Layer menu.
Load a Layer🔗
- Choose the Part in you wish to load a Layer.
- Choose Layer > Load Layer.
Result: The loaded Layer will appear after the selected Layer.
Save a Layer🔗
- Select the Layer you wish to save.
- Choose Layer > Save Layer.
Save the Default Layer🔗
By default, when you create a Layer, it is configured a HALion Sonic factory preset. You can change this behavior such that a Layer of your choice is loaded whenever you create a Layer.
- Select the Layer you wish to be the default Layer when a Part is created.
- Choose Layer > Save Default Layer.
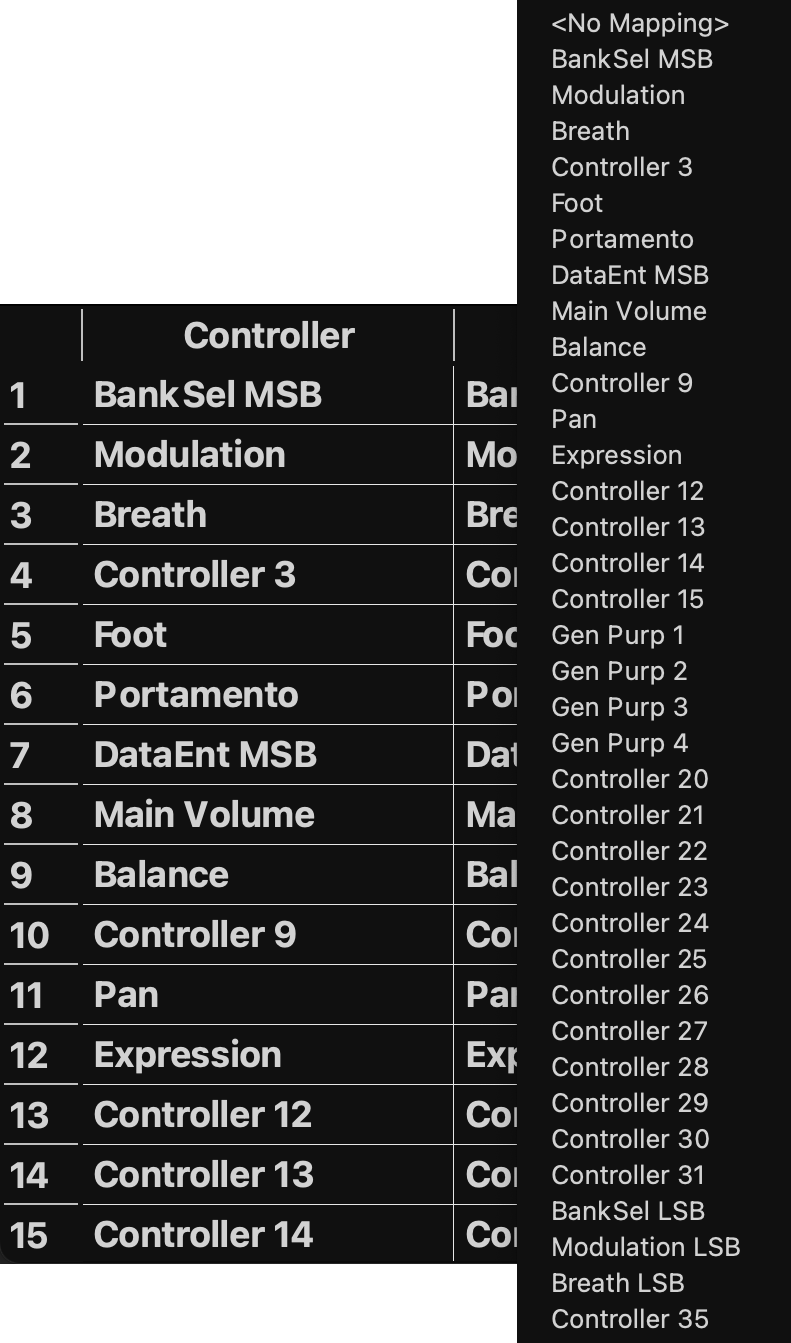
Layer Controller Maps🔗
Layer controller maps are one of VST Live’s most powerful features. They allow any incoming MIDI controller number to be remapped to any other (in real-time).
Creating a Mapping🔗
- Choose Layer > Layer Controller Map.

- Click in the “Mapped To” column of the incoming MIDI controller you wish to remap.
-
A menu of available controller mappings will appear; choose your destination mapping.
Activation Values🔗
The “Send” column provides the ability to specify a value to be sent for each controller when the Layer is activated.
- Click in the “Send” column on the row corresponding to the controller mapping you wish to add an activation value to.
- In the pop-up menu that appears, choose the value or “off”.
Block a Mapping🔗
You can block a mapping to prevent it from functioning.
Procedure
- Click in the “Blocked” column on the row corresponding to the controller mapping you wish to block.
- Choose “On”.
Zones🔗
Using Zones is way to view and configure the Layers in a Part. Use Zones if you want to assemble these Layers into a single composite instrument.
Usage🔗
In the Zones view, each Layer is given its own Zone. This Zone allows you to control the range of notes and velocity levels for which the Layer is activated.
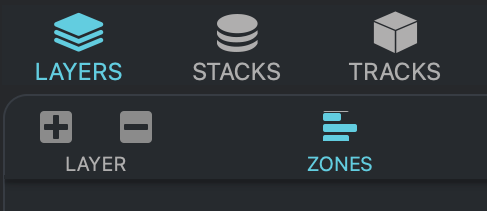
Entering the Zones🔗
Display the Zones view of a Part by clicking the Zones icon in the main panel’s header ribbon. (Ensure you are already in the Layers view of a selected Part.)
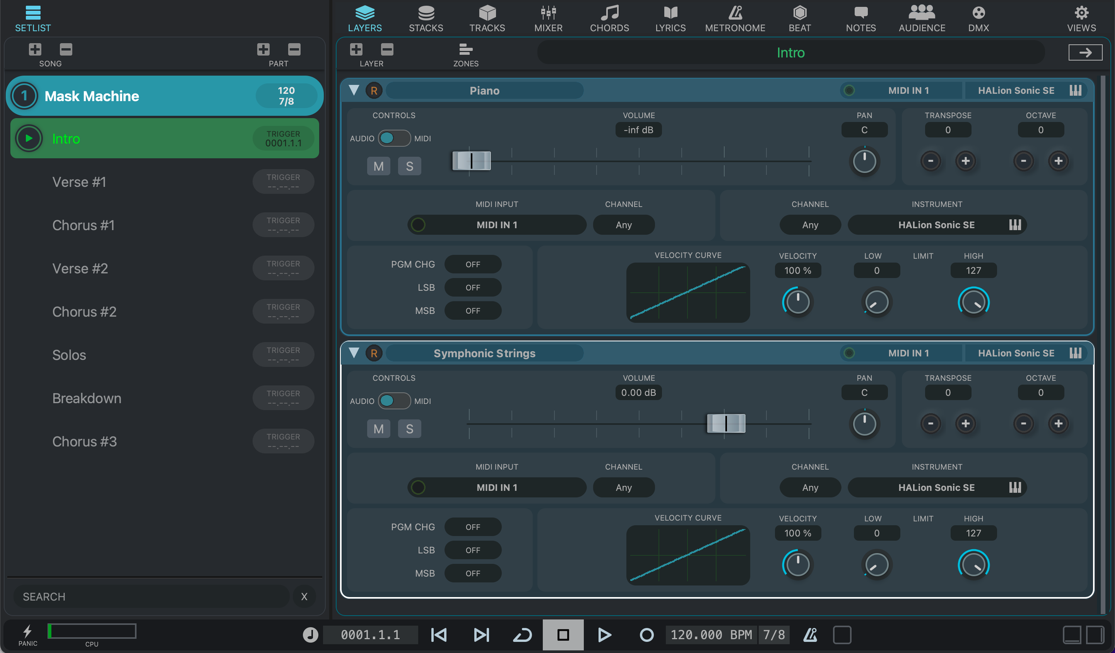
Example🔗
In this example, a keyboard player wants to perform “Intro” Part of a Song on a single keyboard. Musically, the intro begins with a combination of strings and piano, and as the volume builds, the audience should only hear the piano. To do this, two Layers have been created hosting HALion Sonic virtual instruments. On one Layer, a piano program is loaded; on the other, a strings patch is loaded. They are both set to the same MIDI channel.
Here is the Layers view of the Intro Part:
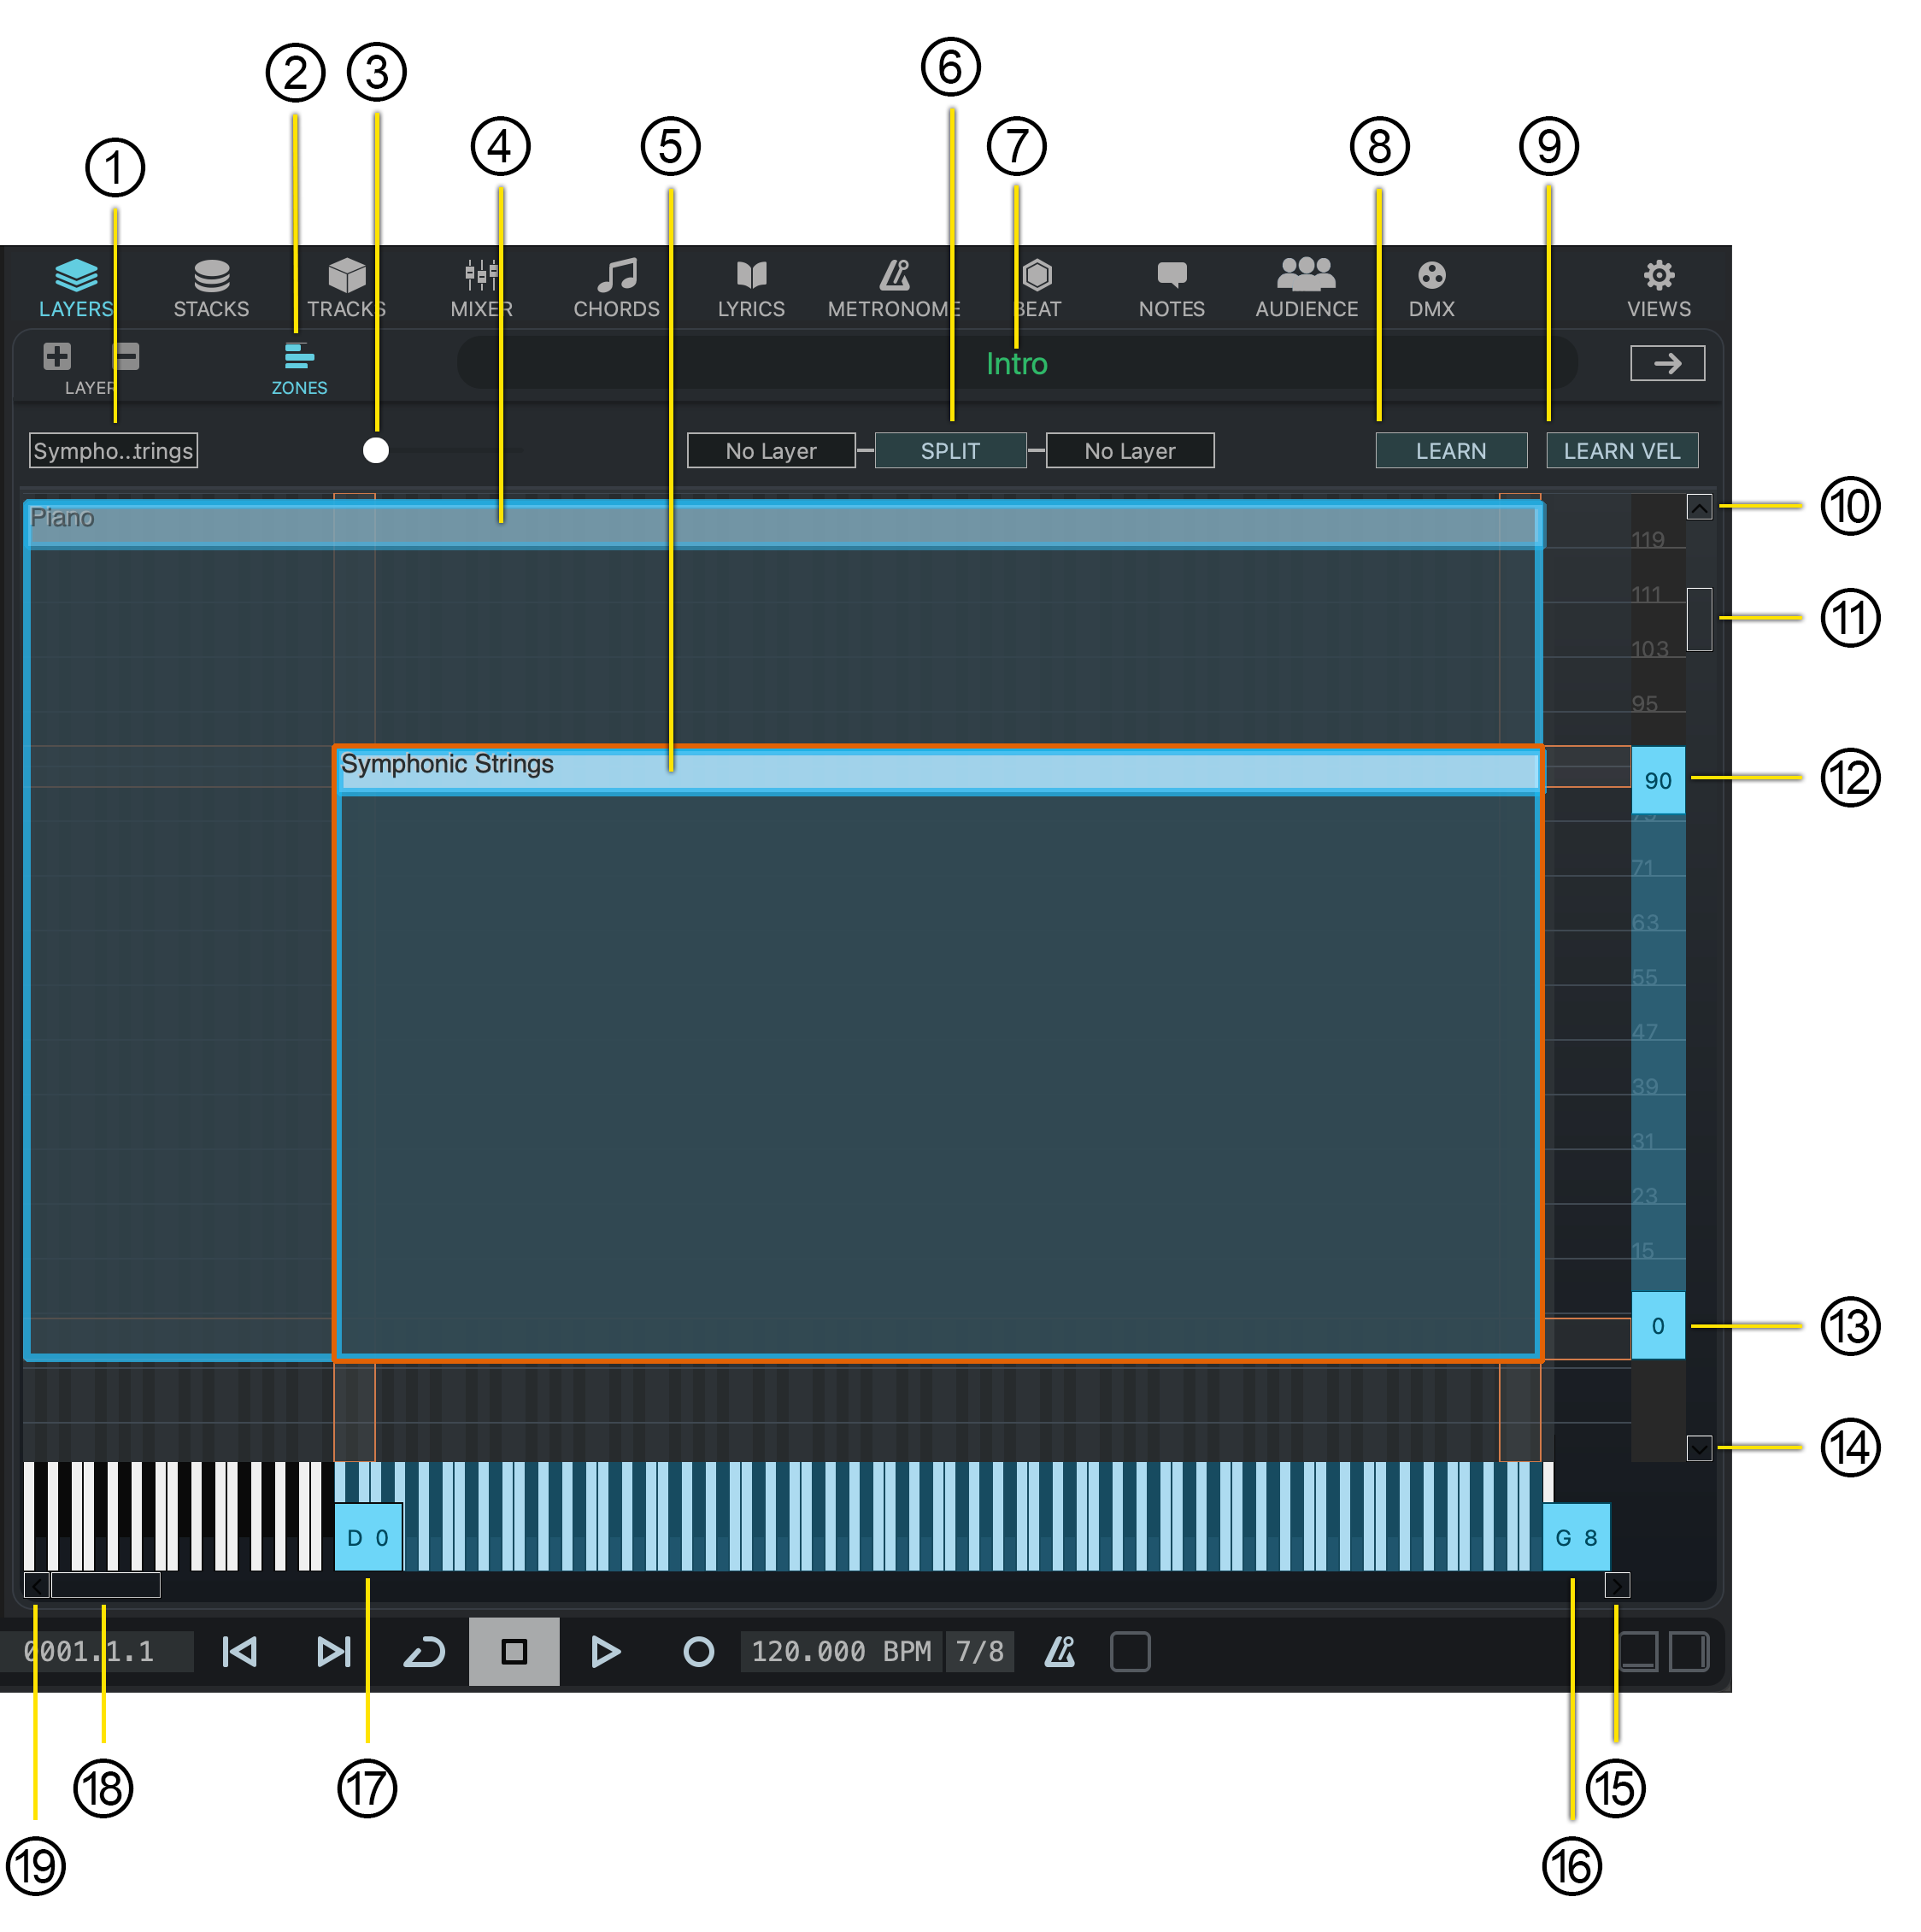
Here is the Zones view:
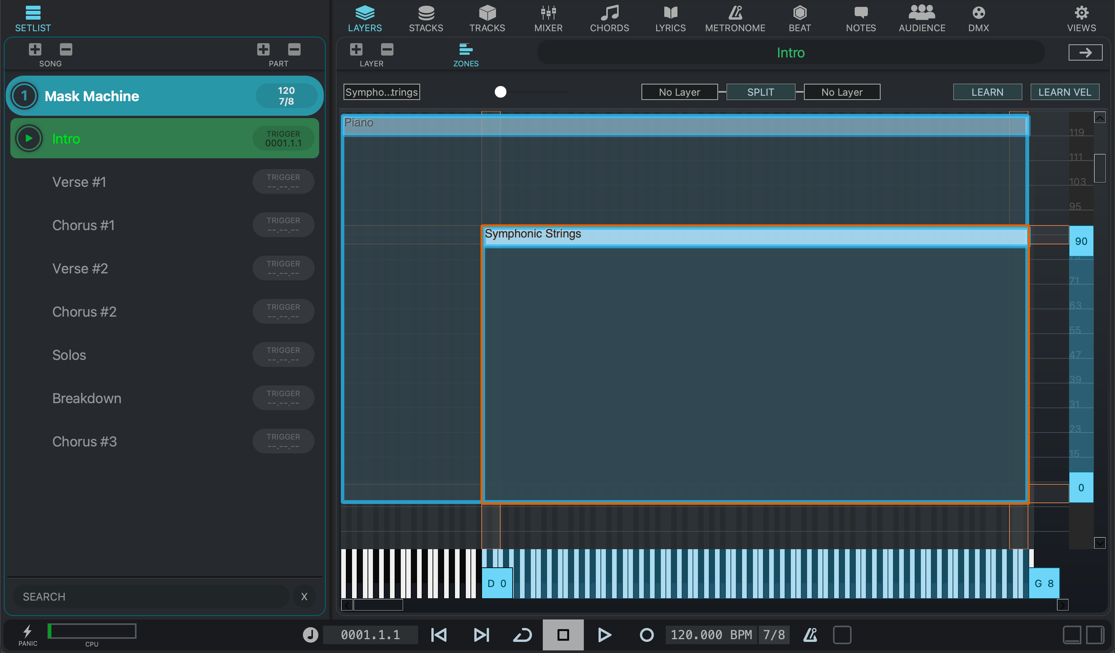
The two Layer’s Zones are configured such that:
- The strings Layer is activated for notes above “DO” which have a velocity equal to or less than 90.
- The piano Layer is activated for the full range of notes, at all velocity levels.
This creates a single piano/strings program for the Intro which can be performed on one keyboard.
Interface🔗
When a Part is created, its Zones are initialized to values that do not affect their Layers. Enter the Zones view to change them.
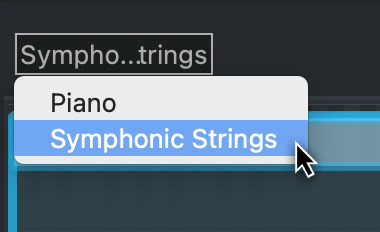
- Layer Selection Menu
Click this area to select the Layer you want to edit the Zone for. A pop-up menu will display all the Layers for the selected Part.
- Zones View Display
Click this icon to activate the Zones view mode.
- Horizontal Zoom
This slider allows you to adjust the horizontal zoom level of the Zones view.
- Non-Selected Layer
This Layer is not currently selected to edit; it is shown with a blue outline.
- Selected Layer
This Layer is currently selected for editing; it is shown with a red outline.
- Split Layer
Engages the split Layer Zone function; Layers must be selected for each side.
- Part Name
The name of currently selected Part is displayed here.
- Learn Note Number Range
Click this button to specify the upper and lower key ranges for the currently-selected Layer Zone. After clicking this button, press the lower and upper keys on the controlling MIDI keyboard, as guided by the interface.
- Select the lower boundary.

- Select the upper boundary.

The range for the Zone is now set.
- Select the lower boundary.
- Learn Note Velocity Range
Click this button to specify the upper and lower velocity ranges for the currently-selected Layer Zone. After clicking this button, press a key at the lowest and highest velocity on a controlling MIDI keyboard.
- Vertical Scroll Up Arrow
Scroll the Zones View upward.
- Vertical Scroll Handle
Drag to scroll vertically up or down.
- Layer Velocity Maximum
This control displays the maximum velocity level for which the selected Layer will be activated. Drag it up or down to change this the Zones View upward.
- Layer Velocity Maximum
This control displays the maximum velocity level for which the selected Layer will be activated. Drag it up or down to change this the Zones View upward.
- Vertical Scroll Down Arrow
Scroll the Zones View downward.
- Horizontal Scroll Right Arrow
Scroll the Zones View rightward.
- Note Number Maximum
Displays the maximum velocity level for which the selected Layer will be activated. Drag it left or right to change.
- Note Number Minimum
Displays the minimum velocity level for which the selected Layer will be activated. Drag it left or right to change.
- Horizontal Vertical Scroll Handle
Drag to scroll horizontally.
- Left Horizontal Scroll Arrow
Scroll the Zones View leftward.